
IridiumMaster
-
Posts
72 -
Joined
-
Edit:
Ketch did a fantastic job of optimizing my original build even further, he heh heh. Scroll down for his version. It gets ~200% global recharge without sacrificing much; his posts offer an explanation.
Edit #2:
And it gets better.. Oedipus Tex took a pass on it and created a unique flavor with different emphases. Check it out. I think it's pretty cool, as well.
Cheers and Happy Holidays All
__________________________________________________ __
Hi All,
for kicks, I decided to purple out the first character I ever made, a Grav/Empathy controller. Grav is normally underpowered for trollers, but I am actually having a blast with this configuration, so thought I'd share it.
Highlights:
+Indomitable Will is basically perma with the Spiritual alpha slot, as long as you remember to hit hasten fast enough.
+Wormhole recharges every twenty seconds or so and has a 30 second stun duration, heh.
+The Singularity's holds and immobs are OP'd and damage is great for him/her/it too.
+Can keep four or five people Forted at a time.
+Near perma Adrenaline Boosts.
+Zero endurance problems with fast-recharging auras.
+40% Smashing/Lethal Resistances
+Proc'd Confusion Aura for reduced aggro problems
+Phase shift for emergencies (bind it, and you should be ok, given good reflexes)
I took this guy into a cave mission on a +2 8 man team going against Malta (Crimson arc), and he didn't die once.. Anyway, feel free to use this as a cheat sheet or template for your own builds if you're one of the other rare grav/emps out there and have cash to burn.
Cheers,
IM
Hero Plan by Mids' Hero Designer 1.90
http://www.cohplanner.com/
Click this DataLink to open the build!
Wildernaught: Level 50 Magic Controller
Primary Power Set: Gravity Control
Secondary Power Set: Empathy
Power Pool: Concealment
Power Pool: Flight
Power Pool: Speed
Ancillary Pool: Psionic Mastery
Hero Profile:
Level 1: Crush- (A) Gravitational Anchor - Immobilize
- (3) Gravitational Anchor - Accuracy/Immobilize/Recharge
- (3) Gravitational Anchor - Accuracy/Recharge
- (5) Gravitational Anchor - Immobilize/Recharge
- (5) Gravitational Anchor - Immobilize/Endurance
- (A) Doctored Wounds - Endurance/Recharge
- (23) Doctored Wounds - Heal/Endurance/Recharge
- (23) Doctored Wounds - Heal/Endurance
- (25) Doctored Wounds - Heal/Recharge
- (25) Doctored Wounds - Heal
- (A) Apocalypse - Damage
- (11) Apocalypse - Damage/Recharge
- (11) Apocalypse - Accuracy/Damage/Recharge
- (13) Apocalypse - Accuracy/Recharge
- (13) Apocalypse - Chance of Damage(Negative)
- (A) Unbreakable Constraint - Hold
- (7) Unbreakable Constraint - Hold/Recharge
- (7) Unbreakable Constraint - Accuracy/Hold/Recharge
- (9) Unbreakable Constraint - Accuracy/Recharge
- (9) Unbreakable Constraint - Chance for Smashing Damage
- (A) Decimation - Accuracy/Damage
- (15) Decimation - Damage/Endurance
- (15) Decimation - Accuracy/Endurance/Recharge
- (17) Decimation - Accuracy/Damage/Recharge
- (17) Decimation - Damage/Recharge
- (A) Ragnarok - Damage
- (19) Ragnarok - Damage/Recharge
- (19) Ragnarok - Accuracy/Damage/Recharge
- (21) Ragnarok - Accuracy/Recharge
- (21) Ragnarok - Chance for Knockdown
- (31) Gravitational Anchor - Chance for Hold
- (A) Luck of the Gambler - Recharge Speed
- (33) Endurance Reduction IO
- (50) Karma - Knockback Protection
- (A) Doctored Wounds - Heal/Endurance
- (34) Doctored Wounds - Heal
- (34) Doctored Wounds - Endurance/Recharge
- (34) Doctored Wounds - Heal/Endurance/Recharge
- (36) Doctored Wounds - Heal/Recharge
- (A) Luck of the Gambler - Recharge Speed
- (A) Doctored Wounds - Heal/Endurance
- (36) Doctored Wounds - Endurance/Recharge
- (36) Doctored Wounds - Heal/Recharge
- (37) Doctored Wounds - Heal/Endurance/Recharge
- (37) Doctored Wounds - Heal
- (A) Recharge Reduction IO
- (A) Recharge Reduction IO
- (A) Endurance Reduction IO
- (A) HamiO:Cytoskeleton Exposure
- (42) HamiO:Cytoskeleton Exposure
- (43) HamiO:Cytoskeleton Exposure
- (43) Recharge Reduction IO
- (43) Recharge Reduction IO
- (46) Luck of the Gambler - Recharge Speed
- (A) Absolute Amazement - Stun
- (27) Absolute Amazement - Stun/Recharge
- (27) Absolute Amazement - Endurance/Stun
- (29) Absolute Amazement - Chance for ToHit Debuff
- (29) Absolute Amazement - Accuracy/Stun/Recharge
- (A) Endurance Modification IO
- (37) Recharge Reduction IO
- (39) Recharge Reduction IO
- (A) Luck of the Gambler - Recharge Speed
- (A) HamiO:Endoplasm Exposure
- (40) HamiO:Endoplasm Exposure
- (40) HamiO:Endoplasm Exposure
- (40) Damage Increase IO
- (42) Damage Increase IO
- (A) Healing IO
- (39) Recharge Reduction IO
- (39) Recharge Reduction IO
- (A) Endurance Modification IO
- (48) Recharge Reduction IO
- (50) Recharge Reduction IO
- (A) Recharge Reduction IO
- (42) Luck of the Gambler - Recharge Speed
- (46) Recharge Reduction IO
- (A) Coercive Persuasion - Confused
- (45) Coercive Persuasion - Confused/Recharge
- (45) Coercive Persuasion - Accuracy/Confused/Recharge
- (45) Coercive Persuasion - Accuracy/Recharge
- (46) Coercive Persuasion - Contagious Confusion
- (A) HamiO:Ribosome Exposure
- (48) HamiO:Ribosome Exposure
- (48) HamiO:Ribosome Exposure
- (A) Recharge Reduction IO
- (50) Recharge Reduction IO
Level 1: Brawl- (A) Empty
- (A) Celerity - +Stealth
- (A) Empty
Level 4: Ninja Run
Level 2: Swift- (A) Empty
- (A) Empty
- (A) Numina's Convalescence - Heal
- (31) Numina's Convalescence - +Regeneration/+Recovery
- (31) Miracle - +Recovery
- (A) Endurance Modification IO
- (33) Endurance Modification IO
- (33) Endurance Modification IO
Code:| Copy & Paste this data into Mids' Hero Designer to view the build | |-------------------------------------------------------------------| |MxDz;1611;719;1438;HEX;| |78DAA594594F1A511886CF2094222050A5AEA820D69551EAAE499B54D1A8A0D4AD3| |72E1971D449E8606034F5AE3FA06BD2A65BFA1B7ADDF44FB43FA4CB65EFE8B71C16| |E5B213781F7879CF77BE73CE0CA9270B1E219EDE178A7F3EAB150A07F339D3CAE7B| |2593DEF48692746C6F3C8C81EE979533B3F39B59C42884825510AAB4B79EDC2B02E| |4BDF9BAB220FCE8F8FD5C4E333CD3ABD0C2C9BA77A5E372DB5F42190CEC1F065F3C| |228188746166AB8C959CC1A305D3D7DDE3CD3F5230FDB8665EA854253E2CCC8A8E9| |8291338DCC414A2B587AFEB2057A9B80F77345C8AB6817699B107161DB606C12EC0| |F195B84B1EA785241EBF61A6395D09262AC135E802A32AE0C5385FA184325784618| |71C24BC8D6C978DD025937128C45C2CD25C632E115C41D32EE7807E8130DEF191F0| |9FE4F8C0F84D7107772DCE1BC4B156E8D31C6094D138C2942E736C10B435CB486A2| |CD15A45575870522FE171012E3E0B965176EDE8430AF3ECC1B14E60DEAE19DF1413| |D2FC78597EB4D80FA64051F57E849568F89728528979D040DC80A81216AC50F451B| |A5D5C8D614A482D20A72C3D36035CB0D68C6C3B7D78901C9C11279B4448C1B7C03D| |A2A1B6C5DA16D695B65AC113AD61949C20CC4DB396E6BEFA64251AE7787E172E2C6| |716F219EE22D68979CA26B927BE9BBCE108D1E60CCC288889C2512AD2E2F3107815| |E19E8E53646F89738E33BDC6BFD32D0CFD6007713E36F5FE0A086F8ECED43BBB4B6| |E13DC63EE38010D3083FA09E2A6F15F51EF73C728D1158FA28CFA98C5EE9A6C35E7| |EB4E0059748A2A348C74553A4EDE5074A28140A5586FDD7F5D553AAE3DAA807DD42| |49A3ECA0ECA2ECA1ECA3682887281994E2B7F268DF34363483328B328712F4833CC| |3A4131F15378A07C58BD280E243F1A334A2B4A17C4629BAFCE57F85E24FA8A128D5| |EBFF55E3FCAE3836659BCEB37387B1A2E01FC19FEA00DF18DD57305A731483354EB| |CC619AF71C66A9CCA7EFF03F38E281B| |-------------------------------------------------------------------|
-
Hi there,
in case anyone is making their own Ice/Cold build and wants some sort of reference, here's what I ended up with after a good bit of trial and error. I am using him with the Spiritual Rech/Heal Alpha slot. Happy to answer any questions about playability, etc. He is very very survivable: I have not yet died on a TF.
Global recharge is 172% pre-alpha, 35% resists to Smashing/Lethal/Fire/Cold. Aim+Power Build Up is quite devastating to spawns w/ Blizzard. Heat Loss is essentially perma. Assault caps out that last 10% of damage on every power that is 90% there.
Cheers,
IM
Villain Plan by Mids' Villain Designer 1.90
http://www.cohplanner.com/
Click this DataLink to open the build!
Cataclysm: Level 50 Technology Corruptor
Primary Power Set: Ice Blast
Secondary Power Set: Cold Domination
Power Pool: Flight
Power Pool: Leadership
Power Pool: Medicine
Power Pool: Speed
Ancillary Pool: Power Mastery
Villain Profile:
Level 1: Ice Blast- (A) Apocalypse - Damage/Endurance
- (3) Apocalypse - Damage/Recharge
- (3) Apocalypse - Accuracy/Damage/Recharge
- (5) Apocalypse - Accuracy/Recharge
- (5) Apocalypse - Chance of Damage(Negative)
- (A) Analyze Weakness - Defense Debuff
- (7) Analyze Weakness - Accuracy/Defense Debuff
- (7) Analyze Weakness - Accuracy/Recharge
- (9) Analyze Weakness - Defense Debuff/Endurance/Recharge
- (43) Analyze Weakness - Accuracy/Endurance/Recharge
- (A) Luck of the Gambler - Defense
- (17) Luck of the Gambler - Recharge Speed
- (A) Endurance Reduction IO
- (9) Impeded Swiftness - Chance of Damage(Smashing)
- (A) HamiO:Membrane Exposure
- (11) Recharge Reduction IO
- (11) Recharge Reduction IO
- (A) Unbreakable Constraint - Endurance/Hold
- (13) Unbreakable Constraint - Chance for Smashing Damage
- (13) Unbreakable Constraint - Accuracy/Hold/Recharge
- (15) Unbreakable Constraint - Accuracy/Recharge
- (15) Unbreakable Constraint - Hold/Recharge
- (A) Luck of the Gambler - Defense
- (17) Luck of the Gambler - Recharge Speed
- (A) Positron's Blast - Accuracy/Damage
- (34) Positron's Blast - Damage/Endurance
- (37) Positron's Blast - Damage/Recharge
- (37) Positron's Blast - Chance of Damage(Energy)
- (39) Positron's Blast - Accuracy/Damage/Endurance
- (40) Recharge Reduction IO
- (A) Luck of the Gambler - Recharge Speed
- (A) Endurance Reduction IO
- (A) Decimation - Accuracy/Damage
- (31) Decimation - Damage/Endurance
- (40) Decimation - Accuracy/Endurance/Recharge
- (42) Decimation - Damage/Recharge
- (43) Decimation - Accuracy/Damage/Recharge
- (A) Steadfast Protection - Knockback Protection
- (21) Luck of the Gambler - Recharge Speed
- (21) HamiO:Ribosome Exposure
- (23) HamiO:Ribosome Exposure
- (23) HamiO:Ribosome Exposure
- (A) Recharge Reduction IO
- (A) Doctored Wounds - Heal
- (25) Doctored Wounds - Recharge
- (25) Doctored Wounds - Heal/Recharge
- (27) Doctored Wounds - Heal/Endurance/Recharge
- (27) Doctored Wounds - Endurance/Recharge
- (31) Interrupt Reduction IO
- (A) Ragnarok - Chance for Knockdown
- (33) Ragnarok - Damage/Recharge
- (34) Ragnarok - Damage/Endurance
- (34) Ragnarok - Accuracy/Damage/Recharge
- (50) Ragnarok - Accuracy/Recharge
- (A) Accuracy IO
- (29) Recharge Reduction IO
- (29) Recharge Reduction IO
- (31) Recharge Reduction IO
- (A) Luck of the Gambler - Recharge Speed
- (A) Positron's Blast - Damage/Recharge
- (43) Positron's Blast - Damage/Range
- (45) Positron's Blast - Accuracy/Damage
- (46) Positron's Blast - Chance of Damage(Energy)
- (46) Positron's Blast - Accuracy/Damage/Endurance
- (46) Recharge Reduction IO
- (A) Analyze Weakness - Defense Debuff/Endurance/Recharge
- (36) Analyze Weakness - Accuracy/Defense Debuff
- (36) Achilles' Heel - Chance for Res Debuff
- (36) Analyze Weakness - Accuracy/Recharge
- (37) Analyze Weakness - Accuracy/Endurance/Recharge
- (40) Analyze Weakness - Defense Debuff
- (A) Recharge Reduction IO
- (39) Recharge Reduction IO
- (39) Endurance Modification IO
- (42) Endurance Modification IO
- (A) Recharge Reduction IO
- (42) Recharge Reduction IO
- (A) HamiO:Ribosome Exposure
- (45) HamiO:Ribosome Exposure
- (45) HamiO:Ribosome Exposure
- (A) Hecatomb - Damage/Endurance
- (48) Hecatomb - Damage/Recharge
- (48) Hecatomb - Accuracy/Damage/Recharge
- (48) Hecatomb - Accuracy/Recharge
- (50) Hecatomb - Chance of Damage(Negative)
- (A) Recharge Reduction IO
- (50) Recharge Reduction IO
Level 1: Brawl- (A) Empty
- (A) Empty
- (A) Empty
Level 4: Ninja Run
Level 2: Swift- (A) Empty
- (A) Empty
- (A) Numina's Convalescence - +Regeneration/+Recovery
- (33) Miracle - +Recovery
- (A) Performance Shifter - Chance for +End
- (19) Endurance Modification IO
- (19) Endurance Modification IO
- (33) Endurance Modification IO
Code:| Copy & Paste this data into Mids' Hero Designer to view the build | |-------------------------------------------------------------------| |MxDz;1605;755;1510;HEX;| |78DAA5935B53525114C7F7068CB88988A462205E119023A476B1999A11B568A428B| |B4D35310C1C8519E430079CF2AD0FD0BB5DA6D7BE40D7D19CB2A7EA21ABEFD1E51B| |D0DA6B6DC1E4B133F0FF9DBDF65A6BAFBDCEDEA9FB7376C61E9C65DC992865ABD54| |C42D3F5B54A4DD3AD57D55CA1AC95B495754B225BCBE64AEBD5553363CCDB70C95C| |C99657D4BC92CCA9995988AEF99B53B36BCBCB4A422BE53373DA6AB19CAD15B5B22| |B592EA8BA5AAE297B2FB6B4A69594855271A55073E2FBA29ACDAB7AB550AC38709C| |52F3C55CB1AC5A71B45451D57CE77CA59853D2DA3D55CFA46055555FEF81BAA6E11| |F3330F9D44D3888334394A0204C1384386293EF73FF8AA643BB846F88C3DF11E11F| |882D70A7883AE75D5C983A3C8877A0464E33C60186A1CF61EC63C720B28D620C6D3| |30093915923E82131091E665984F93C2E644F121610EDE708F3886D486B914558FE| |29620AE66D34D3667B81B9075E22865F11DE2246DF2082B4BC05D67650147350A24| |E30396937CC49BB9986DC2E59A46B031064FE4788E01344E83122FC14F11EA2DD94| |C1E4EEC1467451EEAE33D4832307E887353DB20C0F55D60FA66EB99FEE4B18DD932| |6A410DE8B844584BF0FA3C497ED9595F69EC09605261103C7095388F834E203C4F6| |91BBB1CF8B198E46F6C34F7041313ED9131F6D4524EF97F5F55387C3AF11E3D4FD2| |8F53B4AFD8E52A21D881D945183E278F9D8D02E6107E0664374F486E9CC05E9587E| |84A811CEB1CC114A342A114084089F8C8C8DC98338460E21C2679889D08C21229B3| |E7E805FC04791BD53C2B8F0449030460851EF228841E8494C2E16A355E2B277A6C6| |C5821F3C6CB1C59236356E13E36849367DFEEBD9B4EFE5B15CB6822E09B926E4869| |09B426E09B92DE48E90BB423242EA5B8D68E74951D0292133424E0BF174803C149E| |6671D96C42EC421C42DA8538857408710BF10A7926A46E8160A3DCE14FC8C1F9FEF| |DFF6AB1FC6E5A38BF8EA72E70818B1BF6A73963E41BF8393AE908480408B196BE87| |5B2CF116CB548B65B2C5D2ECF75F0E1C3425| |-------------------------------------------------------------------|
-
As the title says, I can't see any set bonuses on my info screen, or anyone else's. A little odd.
-
Quote:Hey jshmoeOriginally Posted by jshmoe
 You are looking at SL wrong. It's not a heal. It's an attack that happens to heal. The benefits of using it as an attack outweigh the benefits of using it as a heal. If you are looking for optimal, which you said you are, then you MUST use SL and slot SL like an attack. There is really no other way around it.
 I realize this may be thread-jacking, but since I'm using a variant of your ultimate ***-kicking build, might I inquire what you are going to do with it for I19? Any plans on what will you use with the three extra powers/incarnate slots?
Cheers,
IM -
I think this is a bug. All the Praetorian cleaners are emitting script code in local..
Examples:
[NPC] Sweeper: CIT[ESC(BAF)]; CWK.TSK = RTN.BAF(CIT)
[NPC] Sweeper: PPL.ATK(CWK); CWK.TSK[DEF(CWK)] > CWK.TSK[CLN(PRA)]; CWK.TSK = DEF(CWK)
Cleaner: If CWK.SEE[ATK(ADJ)] Then CWK.RSP(RCP)
I have not seen this before today... Unless this is just really clever immersive writing...
Thanks,
IM -
Hmm, I'll have a look at your builds and let you know what I think. I just posted a similar thread, with my current build :P You can look at it for purposes of comparison if you like.
IM -
Grats! I followed a very similar process to my first 2 billion.. which led me to create an uber scrapper as well - dm/invuln (variant of jshmoe's build, bye bye death). Now I'm sort've puzzled about what to do next. I have a purpled tank, a purpled scrapper, and a purpled corruptor. Purple prices have suddenly jumped to ~ 250 million, which seems downright unreasonable. Any bets on when/if they will come down again?
-
Hi All,
back in the day, almost when IOs first came out, this is a character I put together. I currently have him slotted and spec'd as detailed below. I wondered if you Corruptor experts could help me improve him? I would like to squeeze some more recharge in and (maybe) try and softcap him to smashing and lethal, but I really don't know where to go with it beyond where I'm at. Your help is greatly appreciated.
Thanks,
IM
Villain Plan by Mids' Villain Designer 1.803
http://www.cohplanner.com/
Click this DataLink to open the build!
Pauldron: Level 50 Technology Corruptor
Primary Power Set: Ice Blast
Secondary Power Set: Cold Domination
Power Pool: Fitness
Power Pool: Flight
Power Pool: Medicine
Power Pool: Speed
Ancillary Pool: Mace Mastery
Villain Profile:
Level 1: Ice Blast- (A) Apocalypse - Accuracy/Damage/Recharge
- (3) Apocalypse - Damage/Endurance
- (3) Apocalypse - Accuracy/Recharge
- (11) Recharge Reduction IO
- (11) Apocalypse - Damage/Recharge
- (13) Apocalypse - Chance of Damage(Negative)
- (A) Defense Debuff IO
- (13) Defense Debuff IO
- (15) Recharge Reduction IO
- (17) Accuracy IO
- (A) Positron's Blast - Accuracy/Damage
- (17) Positron's Blast - Damage/Recharge
- (19) Positron's Blast - Damage/Range
- (19) Positron's Blast - Accuracy/Damage/Endurance
- (25) Positron's Blast - Chance of Damage(Energy)
- (A) Recharge Reduction IO
- (5) Slow IO
- (5) Impeded Swiftness - Chance of Damage(Smashing)
- (A) Recharge Reduction IO
- (7) Recharge Reduction IO
- (7) Recharge Reduction IO
- (27) To Hit Buff IO
- (A) Decimation - Accuracy/Damage
- (9) Decimation - Damage/Endurance
- (9) Decimation - Accuracy/Endurance/Recharge
- (27) Decimation - Chance of Build Up
- (36) Decimation - Damage/Recharge
- (A) Empty
- (A) Positron's Blast - Accuracy/Damage
- (36) Positron's Blast - Damage/Endurance
- (36) Positron's Blast - Damage/Recharge
- (37) Positron's Blast - Accuracy/Damage/Endurance
- (37) Positron's Blast - Chance of Damage(Energy)
- (37) Recharge Reduction IO
- (A) Numina's Convalescence - +Regeneration/+Recovery
- (15) Miracle - +Recovery
- (A) Luck of the Gambler - Recharge Speed
- (A) HamiO:Centriole Exposure
- (33) HamiO:Centriole Exposure
- (34) HamiO:Nucleolus Exposure
- (34) Recharge Reduction IO
- (34) Recharge Reduction IO
- (45) Recharge Reduction IO
- (A) Defense Buff IO
- (21) Defense Buff IO
- (21) Endurance Reduction IO
- (29) Luck of the Gambler - Recharge Speed
- (29) Kismet - Accuracy +6%
- (A) Endurance Modification IO
- (23) Endurance Modification IO
- (23) Endurance Modification IO
- (31) Performance Shifter - Chance for +End
- (A) Flight Speed IO
- (25) Endurance Reduction IO
- (A) Empty
- (A) Doctored Wounds - Recharge
- (40) Doctored Wounds - Heal/Recharge
- (40) Interrupt Reduction IO
- (43) Doctored Wounds - Heal
- (43) Doctored Wounds - Endurance/Recharge
- (43) Doctored Wounds - Heal/Endurance/Recharge
- (A) Recharge Reduction IO
- (31) Recharge Reduction IO
- (31) Recharge Reduction IO
- (A) Accuracy IO
- (33) Accuracy IO
- (33) Recharge Reduction IO
- (46) Recharge Reduction IO
- (46) Recharge Reduction IO
- (A) Recharge Reduction IO
- (39) Recharge Reduction IO
- (39) Achilles' Heel - Chance for Res Debuff
- (39) Recharge Reduction IO
- (40) Accuracy IO
- (A) Positron's Blast - Accuracy/Damage
- (46) Positron's Blast - Damage/Recharge
- (48) Positron's Blast - Accuracy/Damage/Endurance
- (48) Positron's Blast - Damage/Range
- (50) Positron's Blast - Chance of Damage(Energy)
- (50) Recharge Reduction IO
- (A) Recharge Reduction IO
- (42) Recharge Reduction IO
- (42) Recharge Reduction IO
- (42) Endurance Modification IO
- (A) Luck of the Gambler - Recharge Speed
- (45) Defense Buff IO
- (45) Defense Buff IO
- (A) Luck of the Gambler - Recharge Speed
- (48) Defense Buff IO
- (A) Luck of the Gambler - Recharge Speed
- (50) Defense Buff IO
Level 1: Brawl- (A) Empty
- (A) Empty
- (A) Empty
Level 2: Ninja Run
Code:| Copy & Paste this data into Mids' Hero Designer to view the build | |-------------------------------------------------------------------| |MxDz;1425;689;1378;HEX;| |78DA9D93DB4E13511486F7D042E98982B5022DB4E524E7698B188F8909A009866A1| |54F5163D3B40334A9334D5B12B9F301BC478DDEFA021E031AC5F732E35AEBDF9434| |DE3969FF6FF65EFFDE6BCD5E33F9176B21A55E5E534664B5566A368BAB4EA3B15B6| |F398DC03DABBC633B35677BAFB750DAAD551A8EED534AC5DB8EE2DD92BD6D55CCF5| |B2555CA1C5ADE4496865776BCB5C756A95E29AF3BC6A975A55C71E58B777AC8665B| |7CCE39B50C1716AE68D6ACBB69ACD2006B5EAF64E2B2CF779AB522D576D2B20A3CD| |BA655512D7EBD5B27992275FA2E479CA6D35F686A8BA59FA67BB94BEDC6E65D220A| |7BAB2404610985782451985728203A3BDCAA3526208017DB0F7C705EC86D5F51A1F| |11F92C38F505F82A18FA26F84E5E8FF8DD2E0F36F266800F343DAA9668BF6E9DB71| |B869E0EC49704E7C8E7C3465EDF3E615AF5BE06DE0AE2EF04136F043DD42B3FECCA| |EFD2A5966983A03E96200A9FF804A0FE49143E89C22791DD47FB84B18F117E60C87| |9DC3438839F22119D211293C8794A31A0530C2C13BC1E95D61CBBAA897D3516809F| |B43CAA1F2E9A94A9D31A6382112418F9A3F8CC7A29750C764F2C2D86331D48EE4B4| |F83E41B443DC6E004DA82FD92141946440DCBF1A46826A16B4F1424DB741E48C892| |B9DB329ADB006E09C669D5A86EEF289E25D9815F144CE9D725853728AD01C362078| |EC83EAEEDE3983AAB71448F143D1E4D638F0B3437A58B9E424F17D1CC0C9A99C13B| |99434F7358FC9B92CC18861CDF0CA6663B8153AC7B949AD70F378F062CA02B1A873| |467EAF33561C820F28306591DC922924364C4DBFECEE8C727BFF1CF4CC1DBFEC694| |2133EBEC4129AEBFBF1DFDDFEB20749CD27F2740BAC9729FE521CB2396C72C4F589| |EB23C6329B2B887EDD5918B5CD72596CB2C575862549F7AC54E1F7F6F4196104B98| |A58F25C2D2CF126589B3BC6771FF02A989FE5F| |-------------------------------------------------------------------|
-
A simple suggestion. Let players 'roll the dice' and fight enemies rolled entirely from the Random Number Generator! Random Costumes! Random Names! Random powers from Random powersets! Random map!
To prevent exploitation of 'lucky draws,' make all missions timed. I think this could be highly entertaining. How about you? -
Quote:If you go the eyefinity route, make sure you get a version of the 5850 that explicitly supports the tech and has the ports. Mine supports the tech but doesn't have enough ports for a tri configuration. As well, if you are thinking about Multi-Mon COH (spanning), be aware that the COH graphic engine is massively inefficient. With a single 1920x1080 monitor, full detail settings, I get about 40fps on the Radeon 5850, with occasional drops to 29fps. This is the same card that can play maxed out Team Fortress 2 at like 100fps...Originally Posted by MadHobbit
any thought about eyinfanity on these? go for 3 instead of 2. will COx run on 3?
Finally, may seem like common sense, but you'll need a really big desk if you go tri!
T. -
I don't know if you're big into color fidelity, but I picked these a pair of these guys
http://www.newegg.com/Product/Produc...82E16824002524
because of their e-ips panels (very wide viewing angle, accurate color reproduction out of the box, 329 a piece).
I also have a 5850, and it drives them really nicely.
I'm one of those people who obsessively reads reviews - I read 15 reviews before selecting these particular monitors. They are one of the few e-ips panels that have an excellent response time, as well. Reply to this message if you have any questions.
Best,
IM -
Quote:I have an Ice tank capped to Smashing/Lethal/Energy/Negative Energy, with decent resists to fire and of course, extreme resists to cold. He has hibernate, and on the order of 150% global recharge (Rage is usually stacked). He is very survivable on a team that has at least one buffer. Occasionally, I have been invited to badly constructed PUGs where this is not the case. The results are not pretty. Fail to time hibernate right (get a little lag), or your big heal, and you will go down pretty fast. Sometimes, you can do everything right and a couple lucky shots from the AV will take you down. Otherwise, he's fine. He can solo +2x8 Arachnos, +3x8 Council, +2x8 Cimerorans, etc., all by himself. He does pretty good damage for a tank.Originally Posted by SPiNE
I've been wanting to roll an Ice Tank for the longest time. They seem to be amazing tankers in the upper levels, survivability as well as holding aggro.
Only problem is, what am I suppose to do when I'm tanking AV's? Don't AV's have pretty high base tohit and/or accuracy?
If so, AV's are bound to land several hits on me...and I wont have any resistance at all to withstand it. Sure, Chilling Embrace offers that -14% damage debuff, but that's all I have for mitigation besides my defense and the occasional Hoarfrost. I'm thinking it's going to take a good 50%-75% of my HP per hit from an AV.
I was thinking of going with an Ice/Dark tank, since Dark Melee seems to be the only secondary that has some form of mitigation against AV's, mainly the -tohit debuffs. I was just hoping that stacking -tohit debuffs along with my own defense would help me survive and that Siphon Life would be a nice 20% heal whenever Hoarfrost is down. Is there a better secondary for me to go with besides this?
Edit: Just another question. If Chilling Embrace debuffs a critter's damage by 14%, how does this stack or not stack with your own resistance? For example, if a critter does 100 damage, then Chilling Embrace would cause it to deal 86 damage instead. However, if I have resistance against the critter's damage-type, would my resistance kick in base on the critter's base damage of 100 or would it kick in after Chilling Embrace's damage debuff, which would mean that it'll work off the 86 damage instead of 100 damage.
Malta can be a big problem if not paying attention (rage crash + being sapped = bad situation). Carnies at +2, on a team are generally fine, but anything above that is suicide for him.
Nobody really grabs aggro from him. I have all the AOE auras and taunt.
To be honest, I use my IO'd out dark/invuln scrapper based on jshmoe's build for AV duties now. He is leagues tougher and, with confront, tanks adequately, if not at the same level that my tank does.
Hope that's helpful. Playing an Ice/SS can be a challenge; it's not uber by any means. It is fun, but you'll be frustrated at the holes, given what other sets get naturally. -
Quote:I was inspired by jshmoe's build (thanks jshmoe!), and spent several months putting together the influence / enhancements to get it done. It's great to play and I haven't had any endurance issues at all. I soloed my first AV yesterdayOriginally Posted by jshmoe
I originally made the toon and build for the sole purpose of solo'ing the ITF. Seeing Iggy do it made me want to try it. So the build is a little more garnered for that purpose, hence the softcap to S/L.
That particular build that I posted isn't the one I used though. I did it before the i17 changes, but the build is somewhat similar. My endurance management was better and the defenses were SLIGHTLY higher. I haven't a need to try and put it back to where it was because I did what I set out to do and the build is more than good enough to handle what I do with it now. Just play. Below is my (very slightly altered) version:
Hero Plan by Mids' Hero Designer 1.707
http://www.cohplanner.com/
Click this DataLink to open the build!
Darkswift: Level 50 Mutation Scrapper
Primary Power Set: Dark Melee
Secondary Power Set: Invulnerability
Power Pool: Speed
Power Pool: Leaping
Power Pool: Leadership
Power Pool: Fighting
Ancillary Pool: Body Mastery
Hero Profile:
Level 1: Smite- (A) Kinetic Combat - Accuracy/Damage
- (11) Kinetic Combat - Damage/Endurance
- (13) Kinetic Combat - Damage/Recharge
- (13) Kinetic Combat - Damage/Endurance/Recharge
- (31) Hecatomb - Chance of Damage(Negative)
- (A) Aegis - Resistance
- (7) Aegis - Resistance/Endurance
- (7) Aegis - Resistance/Recharge
- (9) Gladiator's Armor - TP Protection +3% Def (All)
- (25) Steadfast Protection - Resistance/+Def 3%
- (A) Reactive Armor - Resistance
- (3) Reactive Armor - Resistance/Endurance
- (3) Reactive Armor - Resistance/Recharge
- (29) Reactive Armor - Endurance
- (A) Armageddon - Damage
- (5) Armageddon - Damage/Recharge
- (5) Armageddon - Accuracy/Damage/Recharge
- (9) Armageddon - Accuracy/Recharge
- (11) Armageddon - Damage/Endurance
- (15) Armageddon - Chance for Fire Damage
- (A) Recharge Reduction IO
- (15) Recharge Reduction IO
- (17) Recharge Reduction IO
- (A) Doctored Wounds - Heal/Endurance
- (17) Doctored Wounds - Heal
- (37) Doctored Wounds - Endurance/Recharge
- (37) Doctored Wounds - Heal/Recharge
- (37) Doctored Wounds - Recharge
- (A) Numina's Convalescence - Heal
- (23) Numina's Convalescence - Heal/Recharge
- (23) Kinetic Combat - Accuracy/Damage
- (33) Kinetic Combat - Damage/Endurance
- (33) Kinetic Combat - Damage/Recharge
- (33) Kinetic Combat - Damage/Endurance/Recharge
- (A) Luck of the Gambler - Recharge Speed
- (A) Luck of the Gambler - Recharge Speed
- (31) Luck of the Gambler - Defense/Endurance
- (A) Reactive Armor - Resistance/Endurance
- (19) Reactive Armor - Resistance/Recharge
- (29) Reactive Armor - Resistance
- (43) Reactive Armor - Endurance
- (A) Aegis - Resistance/Endurance
- (19) Aegis - Endurance/Recharge
- (27) Aegis - Resistance
- (A) Eradication - Accuracy/Recharge
- (21) Eradication - Damage/Recharge
- (21) Eradication - Accuracy/Damage/Recharge
- (43) Endurance Modification IO
- (A) Damage Increase IO
- (A) Reactive Armor - Resistance/Endurance
- (25) Reactive Armor - Endurance
- (42) Reactive Armor - Resistance
- (A) Reactive Armor - Resistance/Endurance
- (27) Reactive Armor - Resistance/Endurance/Recharge
- (34) Reactive Armor - Resistance
- (34) Reactive Armor - Resistance/Recharge
- (A) Eradication - Accuracy/Damage/Endurance/Recharge
- (36) Eradication - Accuracy/Recharge
- (40) Eradication - Accuracy/Damage/Recharge
- (42) Rectified Reticle - To Hit Buff
- (42) Rectified Reticle - To Hit Buff/Recharge
- (A) Luck of the Gambler - Recharge Speed
- (31) Gift of the Ancients - Defense
- (36) Gift of the Ancients - Defense/Endurance
- (46) Gift of the Ancients - Defense/Endurance/Recharge
- (A) Luck of the Gambler - Recharge Speed
- (34) Gift of the Ancients - Defense/Endurance
- (36) Gift of the Ancients - Defense
- (40) Gift of the Ancients - Defense/Endurance/Recharge
- (43) Gift of the Ancients - Endurance/Recharge
- (A) Blessing of the Zephyr - Run Speed, Jump, Flight Speed, Range
- (A) Hecatomb - Damage
- (39) Hecatomb - Damage/Recharge
- (39) Hecatomb - Accuracy/Damage/Recharge
- (39) Hecatomb - Accuracy/Recharge
- (40) Hecatomb - Damage/Endurance
- (A) Recharge Reduction IO
- (A) Mocking Beratement - Taunt
- (45) Mocking Beratement - Taunt/Recharge
- (45) Mocking Beratement - Taunt/Recharge/Range
- (45) Mocking Beratement - Accuracy/Recharge
- (46) Mocking Beratement - Taunt/Range
- (46) Mocking Beratement - Recharge
- (A) Numina's Convalescence - +Regeneration/+Recovery
- (48) Numina's Convalescence - Heal
- (48) Miracle - +Recovery
- (48) Performance Shifter - Chance for +End
- (50) Performance Shifter - EndMod
- (50) Endurance Modification IO
- (A) Luck of the Gambler - Recharge Speed
- (50) Luck of the Gambler - Defense
Level 1: Brawl- (A) Empty
- (A) Celerity - +Stealth
- (A) Empty
Level 0: Ninja Run
------------
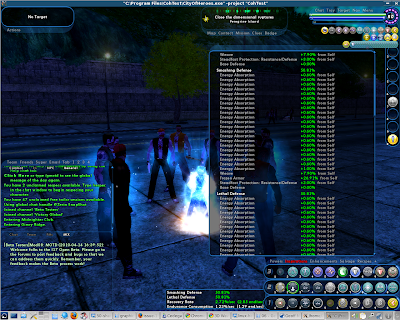
Set Bonus Totals:- 21.6% Defense(Smashing)
- 21.6% Defense(Lethal)
- 15.4% Defense(Fire)
- 15.4% Defense(Cold)
- 17.3% Defense(Energy)
- 17.3% Defense(Negative)
- 6% Defense(Psionic)
- 13.8% Defense(Melee)
- 11.6% Defense(Ranged)
- 10.7% Defense(AoE)
- 7.2% Max End
- 70% Enhancement(RechargeTime)
- 30% Enhancement(Accuracy)
- 4% Enhancement(Heal)
- 5% FlySpeed
- 40.2 HP (3%) HitPoints
- 5% JumpHeight
- 5% JumpSpeed
- MezResist(Held) 2.75%
- MezResist(Immobilize) 9.9%
- MezResist(Terrorized) 2.2%
- 12% (0.2 End/sec) Recovery
- 44% (2.46 HP/sec) Regeneration
- 11.3% Resistance(Fire)
- 6.3% Resistance(Cold)
- 5% Resistance(Toxic)
- 15% RunSpeed
Set Bonuses:
Kinetic Combat
(Smite)- MezResist(Immobilize) 2.75%
- 20.1 HP (1.5%) HitPoints
- 3.75% Defense(Smashing,Lethal), 1.88% Defense(Melee)
(Resist Physical Damage)- 5% RunSpeed
- 3.13% Defense(Fire,Cold), 1.56% Defense(AoE)
(Resist Physical Damage)- 3% Defense(All)
(Resist Physical Damage)- 3% Defense(All)
(Temp Invulnerability)- MezResist(Immobilize) 1.1%
- 1.25% Defense(Energy,Negative), 0.63% Defense(Ranged)
- 1.25% Defense(Smashing,Lethal), 0.63% Defense(Melee)
(Shadow Maul)- 4% (0.07 End/sec) Recovery
- 2.52% Resistance(Fire,Cold)
- 15% Enhancement(Accuracy)
- 10% Enhancement(RechargeTime)
- 5% Resistance(Toxic)
(Dull Pain)- MezResist(Terrorized) 2.2%
- 1.26% Resistance(Fire,Cold)
- 4% Enhancement(Heal)
- 5% Enhancement(RechargeTime)
(Siphon Life)- 12% (0.67 HP/sec) Regeneration
(Siphon Life)- MezResist(Immobilize) 2.75%
- 20.1 HP (1.5%) HitPoints
- 3.75% Defense(Smashing,Lethal), 1.88% Defense(Melee)
(Combat Jumping)- 7.5% Enhancement(RechargeTime)
(Maneuvers)- 10% (0.56 HP/sec) Regeneration
- 7.5% Enhancement(RechargeTime)
(Resist Elements)- MezResist(Immobilize) 1.1%
- 1.25% Defense(Energy,Negative), 0.63% Defense(Ranged)
- 1.25% Defense(Smashing,Lethal), 0.63% Defense(Melee)
(Unyielding)- 5% RunSpeed
- 3.13% Defense(Fire,Cold), 1.56% Defense(AoE)
(Dark Consumption)- 1.8% Max End
- 3.13% Defense(Energy,Negative), 1.56% Defense(Ranged)
(Tough)- MezResist(Immobilize) 1.1%
- 1.25% Defense(Energy,Negative), 0.63% Defense(Ranged)
(Resist Energies)- MezResist(Immobilize) 1.1%
- 1.25% Defense(Energy,Negative), 0.63% Defense(Ranged)
- 1.25% Defense(Smashing,Lethal), 0.63% Defense(Melee)
(Soul Drain)- 1.8% Max End
- 3.13% Defense(Energy,Negative), 1.56% Defense(Ranged)
(Soul Drain)- 1.88% Defense(Smashing,Lethal), 0.94% Defense(Melee)
(Invincibility)- 7.5% Enhancement(RechargeTime)
(Invincibility)- 2% (0.03 End/sec) Recovery
- 2.5% Resistance(Fire)
(Weave)- 7.5% Enhancement(RechargeTime)
(Weave)- 2% (0.03 End/sec) Recovery
- 2.5% Resistance(Fire)
- 1.8% Max End
(Midnight Grasp)- 4% (0.07 End/sec) Recovery
- 2.52% Resistance(Fire,Cold)
- 15% Enhancement(Accuracy)
- 10% Enhancement(RechargeTime)
(Confront)- 1.8% Max End
- MezResist(Held) 2.75%
- 2.5% Defense(Smashing,Lethal), 1.25% Defense(Melee)
- 3.13% Defense(Fire,Cold), 1.56% Defense(AoE)
- 7.5% Enhancement(RechargeTime)
(Physical Perfection)- 12% (0.67 HP/sec) Regeneration
(Physical Perfection)- 5% JumpSpeed, 5% JumpHeight, 5% FlySpeed, 5% RunSpeed
(Tough Hide)- 10% (0.56 HP/sec) Regeneration
- 7.5% Enhancement(RechargeTime)
-
I have posted on this subject previously. I think Hibernate is weak sauce and should be adjusted... That said, bind it to a handy key. It will save you against Multi-Veng'd Nemesis and assorted psi baddies. My sequence for those kind of battles goes something like:
1. Taunt
2. Hibernate if below 25% health
3. Unhibernate as soon as feasible.
4. Hoarfrost if below 25%
If you're interested, I can post my current, functioning build. It's a bit expensive, but not too too bad I don't think.
Cheers -
I have tweaked jshmoe's fab (thanks for that!) build to remove the PVP IO (can't afford it!) and buff up the defense without it so everything is softcapped if you have 1-2 enemies in range ~ 38%. I can think of very few situations where this is not the case. I am a bit worried that this build will have more end issues than jshmoe's, but I'm hoping that with Dark consumption up frequently and conserve power, it will not be an issue. Here's the modded build:
Hero Plan by Mids' Hero Designer 1.707
http://www.cohplanner.com/
Click this DataLink to open the build!
Darkswift V2: Level 50 Mutation Scrapper
Primary Power Set: Dark Melee
Secondary Power Set: Invulnerability
Power Pool: Speed
Power Pool: Leaping
Power Pool: Leadership
Power Pool: Fighting
Ancillary Pool: Body Mastery
Hero Profile:
Level 1: Smite- (A) Kinetic Combat - Accuracy/Damage
- (11) Kinetic Combat - Damage/Endurance
- (13) Kinetic Combat - Damage/Recharge
- (13) Kinetic Combat - Damage/Endurance/Recharge
- (31) Hecatomb - Chance of Damage(Negative)
- (A) Aegis - Resistance
- (7) Aegis - Resistance/Endurance
- (7) Aegis - Resistance/Recharge
- (9) Aegis - Psionic/Status Resistance
- (25) Steadfast Protection - Resistance/+Def 3%
- (48) Aegis - Resistance/Endurance/Recharge
- (A) Reactive Armor - Resistance
- (3) Reactive Armor - Resistance/Endurance
- (3) Reactive Armor - Resistance/Recharge
- (A) Armageddon - Damage
- (5) Armageddon - Damage/Recharge
- (5) Armageddon - Accuracy/Damage/Recharge
- (9) Armageddon - Accuracy/Recharge
- (11) Armageddon - Damage/Endurance
- (15) Armageddon - Chance for Fire Damage
- (A) Recharge Reduction IO
- (15) Recharge Reduction IO
- (17) Recharge Reduction IO
- (A) Doctored Wounds - Heal/Endurance
- (17) Doctored Wounds - Heal
- (37) Doctored Wounds - Endurance/Recharge
- (37) Doctored Wounds - Heal/Recharge
- (37) Doctored Wounds - Recharge
- (A) Numina's Convalescence - Heal
- (23) Numina's Convalescence - Heal/Recharge
- (23) Kinetic Combat - Accuracy/Damage
- (33) Kinetic Combat - Damage/Endurance
- (33) Kinetic Combat - Damage/Recharge
- (33) Kinetic Combat - Damage/Endurance/Recharge
- (A) Luck of the Gambler - Recharge Speed
- (A) Luck of the Gambler - Recharge Speed
- (31) Luck of the Gambler - Defense/Endurance
- (A) Reactive Armor - Resistance/Endurance
- (19) Reactive Armor - Resistance/Recharge
- (29) Reactive Armor - Resistance
- (43) Reactive Armor - Endurance
- (A) Aegis - Resistance/Endurance
- (19) Aegis - Endurance/Recharge
- (27) Aegis - Resistance
- (A) Eradication - Accuracy/Recharge
- (21) Eradication - Damage/Recharge
- (21) Eradication - Accuracy/Damage/Recharge
- (43) Endurance Modification IO
- (A) Damage Increase IO
- (A) Reactive Armor - Resistance/Endurance
- (25) Reactive Armor - Endurance
- (42) Reactive Armor - Resistance
- (42) Reactive Armor - Resistance/Endurance/Recharge
- (A) Reactive Armor - Resistance/Endurance
- (27) Reactive Armor - Resistance/Endurance/Recharge
- (34) Reactive Armor - Resistance
- (34) Reactive Armor - Resistance/Recharge
- (42) Reactive Armor - Endurance
- (A) Eradication - Accuracy/Damage/Endurance/Recharge
- (29) Recharge Reduction IO
- (36) Eradication - Accuracy/Recharge
- (40) Eradication - Accuracy/Damage/Recharge
- (A) Luck of the Gambler - Recharge Speed
- (31) Gift of the Ancients - Defense
- (36) Gift of the Ancients - Defense/Endurance
- (46) Gift of the Ancients - Defense/Endurance/Recharge
- (A) Luck of the Gambler - Recharge Speed
- (34) Gift of the Ancients - Defense/Endurance
- (36) Gift of the Ancients - Defense
- (40) Gift of the Ancients - Defense/Endurance/Recharge
- (43) Gift of the Ancients - Endurance/Recharge
- (A) Blessing of the Zephyr - Run Speed, Jump, Flight Speed, Range
- (A) Hecatomb - Damage
- (39) Hecatomb - Damage/Recharge
- (39) Hecatomb - Accuracy/Damage/Recharge
- (39) Hecatomb - Accuracy/Recharge
- (40) Hecatomb - Damage/Endurance
- (A) Recharge Reduction IO
- (A) Mocking Beratement - Taunt
- (45) Mocking Beratement - Taunt/Recharge
- (45) Mocking Beratement - Taunt/Recharge/Range
- (45) Mocking Beratement - Accuracy/Recharge
- (46) Mocking Beratement - Taunt/Range
- (46) Mocking Beratement - Recharge
- (A) Numina's Convalescence - +Regeneration/+Recovery
- (48) Numina's Convalescence - Heal
- (48) Miracle - +Recovery
- (50) Performance Shifter - EndMod
- (50) Endurance Modification IO
- (A) Luck of the Gambler - Recharge Speed
- (50) Luck of the Gambler - Defense
Level 1: Brawl- (A) Empty
- (A) Celerity - +Stealth
- (A) Empty
Level 0: Ninja Run -
Quote:I'm having this issue with Steel currently. It's randomly wiping out entire teams...Originally Posted by corridor
Yeah, I've been through zone crashes before. I've never had it take so long to come back up though. Usually by the time I've logged in another character the zone is back up.
It all worked out though. I've been around a loooong time and never had it happen just like that before. Just seemed a bit anomalous.
No harm no foul. -
Hi,
this is a more detailed version of my Virtue server post.
Currently, Virtue server appears to be booting entire teams from the game during the course of instanced missions. This happens randomly, but appears to be particularly evident upon loading office maps. Has happened to me six times in the past hour (entire teams kicked from the game on loading maps).
Character Name:
Darkswift
Where I am:
Steel Canyon
Level:
18/19
Difficulty:
+1
I won't post my machine specs because, like I said, it appears to be a server side issue.
Thanks,
IM -
Hi,
I'm just posting this message to warn you that Virtue currently appears to be unstable. I've lost entire teams to DC's 6 times in the last hour. This isn't my machine, this is everyone getting booted from missions...
So, I hope this gets looked at.
IM -
Quote:Alright, well then we have a different perspective, and can agree to disagree on this. From a gameplay standpoint, I see it as a boring power. Useful? Yes. Fun? Not particularly. I would like something that would allow me to be a bit more active.Originally Posted by Aett_Thorn
We are not just defending the status quoe for the sole reason of defending the status quo. I will not speak for the others, but I am worried that, if your change were to be made to the power, that the Devs would change some other factor of the power to compensate.
PvP was NOT the only reason it was changed. Was it a large part of the change? Yes. Was it the ONLY reason? No, it was not. There were some PvE exploits with it as well.
If it were my call, I would advocate for eliminating the phase temp power (Ethereal shift) and leaving in the pool power. I think there are a lot of things more game breaking than chaining hibernate and the pool power. -
Quote:Welcome back to Status Quo Worship Hour, with your host, J---------Ranger!Originally Posted by je_saist
Um. No.
Neither the regeneration nor willpower rezzes contain damage components. The two self rezzes that do contain damage components, Rise of the Pheonix and Soul Transfer, do contain 10mag untouchable for 15 seconds.
It's one of the things that you know... actually makes the power sets... DIFFERENT from each other.
I didn't say ten seconds. Do the freakshow get ten seconds? How about 3 seconds... you know, enough to let the animation complete... like I said in my original post, rather than the post your inner JRanger read in place of my post.
Also, see above, I would suggest making the player 'untargetable' -in a way mechanically identical to what is happening with the NPCs. -
Quote:1. Why not just set the player to be untargetable the same way? Player could still be effected by AOEs.Originally Posted by Dechs Kaison
1. The NPCs aren't protected during the rez animation. They can't be targeted, but you can still lambaste them with AoEs. This means that what you're asking for is not "fair."
2. I couldn't turn down an untouchable period of 10 seconds. Enough time to toggle back up and use a non-combat rez like it was a combat rez. But fair is fair, we'd have to give the same to the all the Freakshow. They'd get 10 seconds to beat on us with impunity.
2. I'm fine with uber tough Freakshow. -
Quote:You guys should make a golden calf and call it 'current status quo.' Why so deferential to imagined authority?Originally Posted by HelinCarnate
Um, no. For reasons, see above posts.
The only trouble with taking the status quo as your metric, in this case, is that the status quo was different before (balanced), and the only reason it was changed was because of a gaming system (PVP) that has now been completely separated from PVE. Thus, a proper status quo argument would actually involve reverting the power to its pre-PVP stage, as PVP considerations no longer apply. -
Quote:You're conflating a bunch of things that shouldn't be conflated, in order to make me seem unreasonable.Originally Posted by je_saist
Question: why on earth are you running Bank AV's? Well, other than for the badge.
Second: My own Ice Tank can pretty much take on every AV but Mother Mayhem and pretty much hold aggro while the team works off the minions.
Which actually is going to bring me to my point.- Not All Power Sets Are Created To Be Equal.
- Not All Power Sets Will Give the Same Play Experience.
It's not designed to be a Single-Target aggro holder. Without a mob around to feed Energy Absorption, you are supposed to be feeling the impact of no endurance long before you feel the impact on your HP bar.
So, I'm going to be blunt here.
What you want, you aren't going to get.
The, what we'll call, "AV" hole is intentional in the design of the power-set. The weakness can be offset by other archtypes buffs and debuffs. Patching up this "AV" hole would actually discourage teaming and... you know... working together. Since what you are asking for goes against the design of the game... it really doesn't matter how you phrase it, sell it, or communicate the idea.
Not. Going. To. Happen.
Ask yourself: Was Hibernate balanced for Ice Tanks, 'out of the box?'
The answer is: 'Yes.'
Only many issues later, when PVP exploits arose, was a sweeping 'global' change made to this power. It is my contention that this change was not properly considered with respect to the only tanker primary that uses it as a 'stock' part of its repertoire.
If you follow this reasoning, what you are saying about game balance intentions goes out the window. As far as I am aware, the PVP change was not made to impact Ice tankers specifically, nor was it intended to balance the PVE aspect of the game. Therefore, your point has no merit... this change was not a PVE balance consideration. The fact that you think the set is more 'balanced' to your playstyle now is also irrelevant.
I am not talking about soloing AVs, here. I am talking about a reasonable 'emergency' power used by the prime tank to prevent teamwipes in combination with taunt. -
Quote:Look- I love my Ice tank for concept reasons. Pragmatically speaking, I've improved him greatly with IOs. I do well with him. But out of the box was he any good? Ha ha ha. If you have an alternate build with no IOs, try doing a standard +2 Arachnos radio mission with a team of 8. Let me know how that works out for you. You can substitute Carnies and Malta in there if you like. That leaves... oh yes, two out of the five factions you typically encounter at high levels, being 'straightforward' for ice... namely Council and CoT. Oh wait! If you happen to encounter an all behemoth spawn (fairly typical for CoT), you'll probably die because of your laughably weak fire resistances.Originally Posted by je_saist
This.
Ice is the only power set in the game that can, on it's own, reach Smash / Lethal Softcap Defense on SO's with no IO boosts in mob combat without activating a Tier 9 Alpha Defense:
Ice also gets a good amount of Defense Debuff Resistance. At level 50, you'll be pushing 51.90% Defense resistance (17.30% from Glacial Armor, Frozen Armor, and Wet Ice). Thus, if you've got the cash / merits, you can rack up on IO defense boosts and pretty much never be put into cascading defense failure.
Ice also gets one of the strongest Mob Endurance Reduction powers in the game, as Energy Absorption can yank in -70% AttrEndurance when slammed into the ED limits. Two swipes will pretty much do in every single minion / lewy in the game, and wipe out most bosses. Ice also gets one of the strongest constant toggle slows in the game: wiping out 56% travel speed and 32% recharge on an end usage of .26/s. A Controller Cold Dom / Storm's Snow Storm uses up twice the end per second for a 62.5% run drop... although the recharge drop is better as it's 62.5% as well.
Even on SO builds, Ice is one of the more potent tanker sets in the game. When you start accounting for team-buffs, IO boosts, and accolade powers, Ice gets even more disgusting.
Hoarfrost, for example, can push an Ice tank to 3212.69 Hp. That's cap. That's: MAXIMUM HP:
Even better, Hoarfrost has a base recharge timer of 6minutes and an effect of two minutes. So, just on SO's you can punch it down to a 3 minute timer. If you work the IO system, you can almost get massive recharge boosts and get Hoarfrost really close to perma.
***
Okay, fine. Ice does have some glaring weaknesses. It is only a defense set, so pretty much any attack that does make it through is going to hit for full damage. And yes, it does have a gaping Psi hole so Rularuu / Carnies / Rikti cackle madly with glee. It's also a tremendous end hog, chewing up around 1.56 endurance per second unslotted, never-minding tough and weave.
But for what the set can do on SO's and then IO's? Those tradeoffs, and the hibernation trade-off... are more than worth it.
Point by point:
+Capped smash/lethal resistance with SOs - yes, with all the other tradeoffs you'd Better have some advantage. Ask yourself, is tough/weave Mandatory for survivability on most other tanking builds?
+'Ice also gets a good amount of Defense Debuff Resistance.' That's good, I was not actually aware of the DDR going on here. However... it's on par with other defense based sets that have actual defense against fire/cold (Shields/SR). Fire seems like an extraordinarily common enemy damage type in this game.
+'Mob Endurance Reduction' - doesn't do anything for your survivability, because of the binary nature of endurance in PVE. You will never completely sap your enemies in my experience (how are you slotting to accomplish this?), so you are not really stopping them from attacking you. In long fights it can occasionally make a difference against bosses, but it is hardly noticeable.
+'Slowing/Recharge Reduction' - The slow is enhanceable, the recharge reduction not, correct? The slow is a good deal for keeping taunted enemies near you. I think the recharge reduction is balanced by the fact that if this and Icicles are ticking, you are pulling aggro to yourself like crazy.
+'Hoarfrost' - Most other builds with a big heal (Dull pain, for example) can cap with the heal and make it perma. I don't see this as a huge advantage over most other sets, although the heal is certainly useful.
So, to summarize, we have features that are fairly standard for defense based sets (some decent ddr, ability to cap), a recharge slow (compared to a personal recharge speedup for SR, for example), and a self heal (not standard for defense based sets), balanced against very very low smashing/lethal resists, pathetic fire resists, low base regen, massive psi hole, massive endurance drain only somewhat able to be mitigated by a long animating recovery power, and a tier 9 which, unlike everything else in the game I am aware of, cannot be enhanced in any meaningful way, and which precludes the use of the only true emergency 'temp' power in the game, 'phase.'
I rest my case. -
Quote:Thanks for the mildly patronizing tone (I expected that, of course), but there is nothing wrong with my build, or my playstyle. I am softcapped to Energy/Negative Energy, as well as Smashing/Lethal with sets + tough + weave + combat jumping, at a level of 45.07% or so. My sets are Ice/SS. I have both Hibernate and Hoarfrost, and a global recharge bonus of around 80%, 150% or so with Hasten.Originally Posted by Aett_Thorn
Definitely not. It functions exactly as a Phase Power, except that it's better because you can heal yourself during this time. And it was Hibernate, among a few other powers, in PvP that led to the change in the first place.
Aside from that, if you need Hibernate that often, something else is very, very wrong in your build. Ice is not that weak, and has a number of tools to help you survive incoming damage. I rarely use Hibernate on my Ice Tank, and the times that I do use it are usually when I have a small team taking on a challenge meant for a larger team.
Hibernate is not 'better' than a phase power, it's a different kind of power. You are not 'phasing' out of reality, you are building a wall against the world. Conceptually... that seems different to me.
Thanks for bringing up the fact that this was changed for PVP reasons.. PVP has no bearing whatsoever on this power for PVE, nor should it. It can remain flagged for PVP purposes - I could really care less with PVP as borked as it is right now.
I have no issues with regular spawns of enemies on a decent team. However... Ice is very weak to AVs, imo. First of all, AVs above +0 difficulty can practically ignore even softcapped defenses.. because Ice lacks in terms of diversity of mitigation, this leaves you with your big heal and hibernate to stop the incoming damage. Try the following simple experiment:
1. Get a bank mission with an AV. Put on your team 3 or 4 damage dealers and 3 debuffers with relatively minor heals (if they have heals at all - a typical PUG build, in a mundane situation compared to the classic AV fight).
2. Bring a tray full of greens and purples.
3. If you and your team defeat the AV without dying, you shall be awarded a trophy.
I have done it once, but I died directly after the AV.
Ask yourself: do your other tanks have this kind of difficulty in such a mundane situation?