
Doc_Reverend
-
Posts
616 -
Joined
-
Quote:From the little bit I could see in the Dev Diary, they looked good. I liked what I'm pretty sure was the hospital.Originally Posted by David Nakayama
 When GR comes out, be sure to tell us what you think of the new cityscapes.
 -
Being from New England and having traveled much of the country, I've always noticed Paragon City looks more like, say, San Fransisco than Boston or Providence. New England cities (especially older cities like Boston) almost have more in common with Mercy Island or Port Oaks or Sharkhead than Paragon. The labyrinthine parts of Brickstown is similar to parts of Boston. But New England cities and towns are rarely laid out on a grid pattern, and have all kinds of quirks of architecture. It's joked that H.P. Lovecraft came up with the insane non-euclidean angles of R'yleh after dealing with Boston's bizarre layout.
Though the pushy pedestrians and oblivious drivers... yeah, that's pretty dead-on for New England (especially Massachusetts). :P
Quote:I'd love these, especially the Museum/Gallery, as mission maps too. Robbing the Museum is up there with bank robbery for supervillain stock schemes, and it would really suit a lot of missions. "Stop Barracuda from stealing the Eye of Tim from the Paragon City History Museum!" That sort of stuff. With, you know, dinosaur skeletons and stuff.Originally Posted by Night_Hornet
A Paragon Museum – a building that anyone could enter and look around, this could contain artefacts from COH lore and dev statues etc – you could even run a huge competition the feature a player or two in there.
A Paragon Art Gallery – similar to the Museum, again you could run a competition to feature some fan art in there.
More Chris Jenkins!Quote:More interesting billboards – perhaps with heroes advertising products, e.g. “Positron loves Arctic’s Ice Cream” or “Synapse says slow down when attempting to cross the road”
The zoo... there's kinda sorta something redside with that already in Nerva that I stumbled on to yesterday (I'm sure the rest of you know about it already) at the Longbow base with their secret labs holding Devoured and the Crey base full of critters (everything from Devouring Earth to Red Caps).Quote:A Zoo – busy with citizens with an occasional mob entering there could be fun
An idea I've had for a while is to give Boomtown the Faultline treatment. Not rebuilding it per se, at least not by the good guys. Right now, as I understand it, Boomtown is the center of the 5th Column's resurgence into Paragon City, with their portals and staging areas as they invade and battle both the heroes and the Council. It'd be neat to make Boomtown the center of that conflict, with the rising 5th Column terrordrome or whatever. The anti-Striga, if you will. Gives the zone a purpose besides being 3 square miles of blighted wasteland. -
Taking my level 50 /storm controller to Atlas or Galaxy and using Gale on the level 1 Hellions. They go flying off over the horizon Team Rocket style. Never gets old.
-
Everyone in my SG seems to have this problem. The secondary color on shields arn't appearing, be they in game, tailor, or AE. The secondary pattern color seems locked at black. Since everyone seems to have this problem, I'm beginning to wonder if it's not my settings being wonky.
-
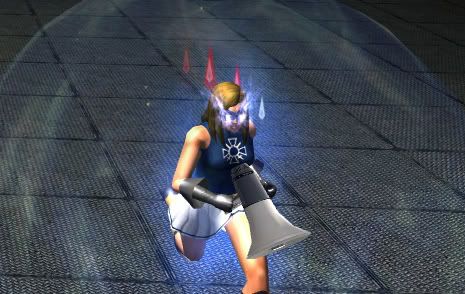
That's funny. Because I'm not kidding. I didn't photoshop it, there are no pixels, and if I was trying to pull some kind of weird joke, I'd probably come up with something better than a random megaphone. These are screenshots from the game, albeit ones I decided to crop to show the relevant areas.
So yeah. -
On the first mission of the Synapse TF last night, our PB randomly acquired a megaphone that only I could see for the entire mission. It was gone when we left the map. I asked the others there about it, and only I could see it. To make sure I wasn't crazy, I took screenshots.
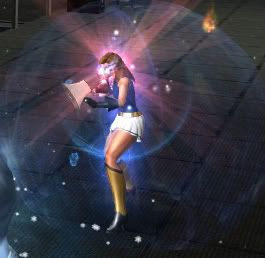
That's a new one for me. Didn't even know there were megaphones in the game, but she had it. -
When I ran it with my Earth/Fire Dominator, my flawed clone was Rad Blast/Devices I think. Had the little targeting drone flying around. It didn't survive the mission, but kept Ajax busy. Go to good, poor, brain damaged Flawed Clone. I will miss you.
-
I meant the combos. Mids really doesn't take them into account. I do know the Typhoon's Edge as part of the Sweep combo does more damage than the move on it's own. 20% was a number I pulled out of the air. It was more my point that on paper, Dual Blades looks a lot less effective than it actually is.
-
Don't believe mids about DB. Ever. It underreports it's effectiveness by about... 20%.
-
Felt like sharing my DB/WP scrapper's build. I built this to fit my playstyle, which is pretty aggressive and based on the idea that enemies can't hurt you when they're defeated. I aimed to play to Dual Blade's strengths and important aspects, so it's first concerns are recharge and accuracy, followed by regeneration/HP and then defense where I can squeeze it in. I lean more towards offense than defense. I've also got all the accolades, so that helps a lot (that extra 20% HP is wonderful).
I took Hurdle at 49 because I felt like it and wasn't really using Exploding Shuriken much. I took Caltrops and Shuriken for concept reasons.
Right now with this build, I can (and do) perma Blinding Feint + Attack Vitals. By the time I'm doing the Attack Vitals combo, Blinding Feint has recharged. Same applies to Sweep. So I'm almost never not attacking. I've had that proc in Blinding Feint for a while and it seems to work pretty well. I'm unsure on the effectiveness of the Winter's Gift IO, but I felt that the extra resistance to recharge debuffs would be handy as I'm so recharge dependent for my survival.
Defense and resists arn't the best, with Smash/Lethal Defense around 16% (effectively 20% when in melee thanks to RttC), though that does take some of the edge off. I'm usually reliant on my HP and regen, but with good positioning I can handle it.
Looking at the build, one option I may consider is taking the sixth slots holding the damage procs in Sweeping Strike and Typhoon's Edge and putting them into Health and Fast Healing and throwing a third Numina IO in, getting me an extra 50 HP, and maybe replace the generic Endurance IOs in Quick Recovery and Stamina with Performance Shifters, netting me 50 more HP. Total from that change would be about 100 extra HP. Though the damage procs are handy.
In any case, this build seems to be serving me well. Right now, I can solo Nemesis maps on +1/x8, and so long as I'm smart about my positioning, I do pretty well with my nuclear powered blender.
Hero Plan by Mids' Hero Designer 1.704
http://www.cohplanner.com/
Level 50 Science Scrapper
Primary Power Set: Dual Blades
Secondary Power Set: Willpower
Power Pool: Leaping
Power Pool: Fitness
Ancillary Pool: Weapon Mastery
Hero Profile:
------------
Level 1: Nimble Slash
(A) Crushing Impact - Accuracy/Damage
(3) Crushing Impact - Damage/Recharge
(7) Crushing Impact - Accuracy/Damage/Recharge
(37) Crushing Impact - Accuracy/Damage/Endurance
(40) Crushing Impact - Damage/Endurance/Recharge
Level 1: High Pain Tolerance
(A) Healing IO
(13) Healing IO
(43) Steadfast Protection - Resistance/+Def 3%
Level 2: Power Slice
(A) Crushing Impact - Accuracy/Damage
(3) Crushing Impact - Damage/Endurance/Recharge
(5) Crushing Impact - Damage/Recharge
(15) Crushing Impact - Accuracy/Damage/Recharge
(40) Crushing Impact - Accuracy/Damage/Endurance
Level 4: Ablating Strike
(A) Crushing Impact - Accuracy/Damage
(5) Crushing Impact - Accuracy/Damage/Endurance
(7) Crushing Impact - Damage/Endurance/Recharge
(11) Crushing Impact - Damage/Endurance
(13) Crushing Impact - Damage/Recharge
(37) Crushing Impact - Accuracy/Damage/Recharge
Level 6: Mind Over Body
(A) Reactive Armor - Resistance/Endurance
(11) Reactive Armor - Resistance
(34) Reactive Armor - Resistance/Endurance/Recharge
(36) Reactive Armor - Resistance/Recharge
Level 8: Typhoon's Edge
(A) Scirocco's Dervish - Accuracy/Damage
(9) Scirocco's Dervish - Damage/Endurance
(9) Scirocco's Dervish - Accuracy/Damage/Endurance
(15) Scirocco's Dervish - Damage/Recharge
(39) Scirocco's Dervish - Accuracy/Recharge
(40) Scirocco's Dervish - Chance of Damage(Lethal)
Level 10: Indomitable Will
(A) Luck of the Gambler - Recharge Speed
Level 12: Combat Jumping
(A) Luck of the Gambler - Recharge Speed
Level 14: Super Jump
(A) Winter's Gift - Slow Resistance (20%)
Level 16: Rise to the Challenge
(A) Numina's Convalescence - Heal
(17) Numina's Convalescence - Heal/Endurance
(17) Numina's Convalescence - Heal/Recharge
(25) Healing IO
(39) Dark Watcher's Despair - Chance for Recharge Slow
(39) Dark Watcher's Despair - To Hit Debuff
Level 18: Vengeful Slice
(A) Crushing Impact - Accuracy/Damage
(19) Crushing Impact - Damage/Endurance
(19) Crushing Impact - Damage/Recharge
(23) Crushing Impact - Accuracy/Damage/Recharge
(34) Crushing Impact - Accuracy/Damage/Endurance
(46) Crushing Impact - Damage/Endurance/Recharge
Level 20: Quick Recovery
(A) Endurance Modification IO
(21) Endurance Modification IO
(21) Endurance Modification IO
Level 22: Blinding Feint
(A) Gaussian's Synchronized Fire-Control - Chance for Build Up
(23) Kinetic Combat - Accuracy/Damage
(25) Kinetic Combat - Damage/Recharge
(45) Kinetic Combat - Damage/Endurance
(46) Kinetic Combat - Damage/Endurance/Recharge
(50) Gaussian's Synchronized Fire-Control - To Hit Buff/Recharge
Level 24: Swift
(A) Run Speed IO
Level 26: Sweeping Strike
(A) Scirocco's Dervish - Accuracy/Damage
(27) Scirocco's Dervish - Damage/Endurance
(27) Scirocco's Dervish - Damage/Recharge
(31) Scirocco's Dervish - Accuracy/Recharge
(34) Scirocco's Dervish - Accuracy/Damage/Endurance
(42) Scirocco's Dervish - Chance of Damage(Lethal)
Level 28: Health
(A) Regenerative Tissue - +Regeneration
(29) Numina's Convalescence - Heal
(29) Numina's Convalescence - Heal/Endurance
Level 30: Stamina
(A) Endurance Modification IO
(31) Endurance Modification IO
(31) Endurance Modification IO
Level 32: One Thousand Cuts
(A) Obliteration - Damage
(33) Obliteration - Accuracy/Recharge
(33) Obliteration - Damage/Recharge
(33) Obliteration - Accuracy/Damage/Recharge
(37) Obliteration - Accuracy/Damage/Endurance/Recharge
(43) Obliteration - Chance for Smashing Damage
Level 35: Heightened Senses
(A) Luck of the Gambler - Defense
(36) Luck of the Gambler - Defense/Endurance
(36) Luck of the Gambler - Defense/Endurance/Recharge
(43) Luck of the Gambler - Recharge Speed
Level 38: Fast Healing
(A) Numina's Convalescence - Heal
(42) Numina's Convalescence - +Regeneration/+Recovery
(42) Healing IO
Level 41: Strength of Will
(A) Resist Damage IO
Level 44: Caltrops
(A) Positron's Blast - Accuracy/Damage
(45) Positron's Blast - Damage/Endurance
(45) Positron's Blast - Damage/Recharge
(46) Positron's Blast - Damage/Range
(50) Positron's Blast - Chance of Damage(Energy)
Level 47: Shuriken
(A) Entropic Chaos - Accuracy/Damage
(48) Entropic Chaos - Damage/Endurance
(48) Entropic Chaos - Damage/Recharge
(48) Entropic Chaos - Damage/Endurance/Recharge
(50) Entropic Chaos - Chance of Heal Self
Level 49: Hurdle
(A) Jumping IO
------------
Level 1: Brawl
(A) Accuracy IO
Level 1: Sprint
(A) Run Speed IO
Level 2: Rest
(A) Recharge Reduction IO
Level 1: Critical Hit
Level 0: Ninja Run
------------
Set Bonus Totals:
3% DamageBuff(Smashing)
3% DamageBuff(Lethal)
3% DamageBuff(Fire)
3% DamageBuff(Cold)
3% DamageBuff(Energy)
3% DamageBuff(Negative)
3% DamageBuff(Toxic)
3% DamageBuff(Psionic)
9.88% Defense(Smashing)
9.88% Defense(Lethal)
6.13% Defense(Fire)
6.13% Defense(Cold)
4.25% Defense(Energy)
4.25% Defense(Negative)
9.25% Defense(Psionic)
9.25% Defense(Melee)
3.63% Defense(Ranged)
9.25% Defense(AoE)
2.25% Max End
60% Enhancement(RechargeTime)
73% Enhancement(Accuracy)
5% FlySpeed
140.6 HP (10.5%) HitPoints
5% JumpHeight
5% JumpSpeed
MezResist(Confused) 2.75%
MezResist(Immobilize) 12.7%
MezResist(Stun) 2.2%
2.5% (0.04 End/sec) Recovery
76% (4.25 HP/sec) Regeneration
20% ResEffect(FlySpeed)
20% ResEffect(RechargeTime)
20% ResEffect(RunSpeed)
1.58% Resistance(Fire)
1.58% Resistance(Cold)
6.25% Resistance(Negative)
5% Resistance(Psionic)
5% RunSpeed
------------
Set Bonuses:
Crushing Impact
(Nimble Slash)
MezResist(Immobilize) 2.2%
15.1 HP (1.12%) HitPoints
7% Enhancement(Accuracy)
5% Enhancement(RechargeTime)
Steadfast Protection
(High Pain Tolerance)
3% Defense(All)
Crushing Impact
(Power Slice)
MezResist(Immobilize) 2.2%
15.1 HP (1.12%) HitPoints
7% Enhancement(Accuracy)
5% Enhancement(RechargeTime)
Crushing Impact
(Ablating Strike)
MezResist(Immobilize) 2.2%
15.1 HP (1.12%) HitPoints
7% Enhancement(Accuracy)
5% Enhancement(RechargeTime)
2.5% Resistance(Psionic)
Reactive Armor
(Mind Over Body)
MezResist(Immobilize) 1.1%
1.25% Defense(Energy,Negative), 0.63% Defense(Ranged)
1.25% Defense(Smashing,Lethal), 0.63% Defense(Melee)
Scirocco's Dervish
(Typhoon's Edge)
10% (0.56 HP/sec) Regeneration
3.13% Resistance(Negative)
9% Enhancement(Accuracy)
3.13% Defense(AoE), 1.56% Defense(Fire), 1.56% Defense(Cold)
3.13% Defense(Psionic)
Luck of the Gambler
(Indomitable Will)
7.5% Enhancement(RechargeTime)
Luck of the Gambler
(Combat Jumping)
7.5% Enhancement(RechargeTime)
Winter's Gift
(Super Jump)
20% ResEffect(RunSpeed), 20% ResEffect(RechargeTime), 20% ResEffect(FlySpeed)
Numina's Convalescence
(Rise to the Challenge)
12% (0.67 HP/sec) Regeneration
25.1 HP (1.87%) HitPoints
Dark Watcher's Despair
(Rise to the Challenge)
20.1 HP (1.5%) HitPoints
Crushing Impact
(Vengeful Slice)
MezResist(Immobilize) 2.2%
15.1 HP (1.12%) HitPoints
7% Enhancement(Accuracy)
5% Enhancement(RechargeTime)
2.5% Resistance(Psionic)
Gaussian's Synchronized Fire-Control
(Blinding Feint)
5% JumpSpeed, 5% JumpHeight, 5% FlySpeed, 5% RunSpeed
Kinetic Combat
(Blinding Feint)
MezResist(Immobilize) 2.75%
20.1 HP (1.5%) HitPoints
3.75% Defense(Smashing,Lethal), 1.88% Defense(Melee)
Scirocco's Dervish
(Sweeping Strike)
10% (0.56 HP/sec) Regeneration
3.13% Resistance(Negative)
9% Enhancement(Accuracy)
3.13% Defense(AoE), 1.56% Defense(Fire), 1.56% Defense(Cold)
3.13% Defense(Psionic)
Numina's Convalescence
(Health)
12% (0.67 HP/sec) Regeneration
Obliteration
(One Thousand Cuts)
MezResist(Stun) 2.2%
3% DamageBuff(All)
9% Enhancement(Accuracy)
5% Enhancement(RechargeTime)
3.75% Defense(Melee), 1.88% Defense(Lethal), 1.88% Defense(Smashing)
Luck of the Gambler
(Heightened Senses)
10% (0.56 HP/sec) Regeneration
15.1 HP (1.12%) HitPoints
9% Enhancement(Accuracy)
7.5% Enhancement(RechargeTime)
Numina's Convalescence
(Fast Healing)
12% (0.67 HP/sec) Regeneration
Positron's Blast
(Caltrops)
2.5% (0.04 End/sec) Recovery
1.58% Resistance(Fire,Cold)
9% Enhancement(Accuracy)
6.25% Enhancement(RechargeTime)
Entropic Chaos
(Shuriken)
10% (0.56 HP/sec) Regeneration
MezResist(Confused) 2.75%
2.25% Max End
6.25% Enhancement(RechargeTime)
| Copy & Paste this data into Mids' Hero Designer to view the build |
|-------------------------------------------------------------------|
|MxDz;1412;706;1412;HEX;|
|78DA9D545B4F1341149EA55B965EA085520AE5525ACA1D567 8F392682268622249A|
|10A5E90BA94519B6CB64D17E5A6067DF6FA037CF4C1679568 F8695EEA99F34D515E|
|DDA4DF37F3CD77CE9C39B3DBA5DDC5A810879784D1B1E03AB E5F2A96EB4EAD26EB5|
|6B15C915E598616EAD59DE105C7752D2144BAB95C5A92AE94 F6E263C72D5D769D2D|
|E9FF5D5A940FA4E74B7BADE2BAB5EA8EAC775EF31EC9BAF4B 6EDE6205AA8565DFBB|
|A746A15EF2126572BDB9EF4FD5393304F8A3529B712576A95 B2BD461155AFB4E4F8|
|DBB2BED74B154DD26F5F95C64FC314F789E645CB26536B992 9BFC5342E995695DD6|
|07B8BC8B314054DA5481E1407965EA77C86CE875013693B90 761C699F923D007B30|
|00BB89955644851D6C82E03C82D7282A882A02C1211A8C8B7 08E299B651AC9303D2|
|39FA5B35B4F38B46D07B48F627699C6F650D301D36D0A0921 BB08250D25F59014D1|
|5204528AA476E416EDFD0125DD21296618BC5DEC26BBE2CBA 022532F5A3576DCC27|
|4C47448519DBAC84EB4A00B87EEC2A17B70E82CFA328BBEDC A5A884BE88C4304BDD|
|A7E839199202C5243FF14E3D059AE544EF0AD3CC32D36C916 9FE235B821495D2074|
|DCD72A21724F5E9FAFAD0C4349A9846F786D0BD2C5A3A8926 5A14D5AFEBEBBFC8AF|
|C6005A328096B49161501B0651F2D0297A49868CDE37F383A B1BFE09FA05FACD946|
|F304D09BE83758ACAE95723D7CD3B8DC44109A6295CDF2DF2 8DEAED4751D8E42A08|
|97B44186097DBF13332C09538869FD6E4F7F6669E60BE82BE EE68869FE1B9341765|
|BDBEDD7DCE5336F406F41EFD0FAF74CADB4E19C6EFDDC0467 18304F3E4EFAFF60E9|
|FABF122EA8609E7C72C2986629639E7CA68D509CBD3CFECFE 77BB4992EB41226BCA|
|1A04060ACAAD1BA827B6ABAA1468E1A6D2A28AB69E338DA2C 397656D5754EC17905|
|171424A93EF14A39AD084144415441BB820E0531057105090 569051F1434FE005B4|
|8ECC0|
|-------------------------------------------------------------------| -
Individually, the DB attacks are not the most damaging in the world. They're not bad, but a bit on the low-side, plus they're all lethal, so you'll be resisted a lot. I'd say they're about... 10-15% weaker on their own.
When you start using the combos, though, you turn from "meh" damage into the thermonuclear blender of doom. DB's two best combos, Attack Vitals and Sweep, are both PbAoE's, allowing you to rather quickly shred through crowds like nobody's business. Also, I've noticed the finishing move of Sweep does about 30% more damage than the move on it's own. And Attack Vitals is mean.
Dual Blades is a sustained damage output set and good at shredding through hordes, and not too shabby against bosses either. The dicey thing with slotting it, especially if you're going for set bonuses, is that it really likes high recharge and accuracy. You don't want to miss, and you want those combos recharging ASAP. Means sometimes making some tradeoffs, at least if you're like me and favor offense over defense. -
Nifty. Sounds handy.
-
How does this proc work? Does it have a chance of firing when you summon the guy, or is it a random chance every X seconds to go off? Also, does it effect you or just your pet?
Also, is it worth investing in this IO, as I've noticed blueside that Soulbound Allegience IOs are fairly affordable and it's a pretty decent set. -
I have a question:
Clamor, the Freakshow endboss for the Sister Psyche Task Force, was originally named Eve van Dorn. The real Countess Crey's birth name was Clarissa van Dorn. Any relation between the two? -
Agreed. I've managed to accidentally delete several tabs and quit private global channels twice because this random pop-up menu appears during a fight and before I can do anything I've somehow quit a channel. I've managed to catch myself before that happens several other times. It's very annoying, especially when you've got to then track down a channel mod.
-
Okay, first off, don't believe everything Mids tells you about DPS. Especially when Dual Blades is concerned. Those numbers don't include the combos or the way damage mitigation (like AoE knockdowns) keep you alive. Someone who knows how to use the set will rock your socks off while slicing them into tiny little pieces (though this is true of any set).
Second. The trend right now with power design seems to be moving away from the earlier stuff, which had an attack chain, some unique or utility powers, and a tier 9 nuke or godmode that might work but is as likely to get you killed because your Endurance is gone (and with Unstoppable, so is your HP). Look at Dual Blades, Shield, Willpower, Dual Pistols, and Demon Summoning. I always find myself going "Damn, this all looks like it'll come in handy." Dual Blades is the most extreme example, of course. But there does seem a leaning towards more interesting tricks that require a bit more thought, and more leaning towards picking good ground and positioning yourself.
I think this is a good thing. I despise nukes and tier 9 godmodes (especially you, Unstoppable), as I'll never use them in a fight. But I'm cool with using Strength of Will or One with the Shield, as there isn't much pain with the crash. I want more power sets with tricks up their sleeves rather than just big numbers. I want to ruin your day and look like a badass doing it. Maybe I won't have the biggest red numbers appearing. But if I'm smart, I'll still be standing, and useful, and be having an interesting time.
So that's what I want Kin Melee to be. Do I expect huge damage? Not really. Fire Melee will still be the king of the DPS mountain (as it should be). Do I expect something kinda quirky, maybe a bit more challenging, but worth it when mastered? Yes. -
The Vanguard costume change, I noticed, uses the Mystic 2 (I think) chest detail emblem as it's base, then the animation plays around it. Something I was thinking would be really cool would be if we could replace the Mystic 2 symbol with our own symbol or icon, maybe using either our SG/VG logo or whatever we have in Costume 1's chest detail. Just gives it a sense of personality. Same colors and animations, but our character's logo appears on the ground when the costume change animation plays.
-
Also, after some tinkering, worked together this. Big "unknowns" are the Hami-Os, since those are insanely hard to find these days.
Hero Plan by Mids' Hero Designer 1.704
http://www.cohplanner.com/
Click this DataLink to open the build!
Andromeda Knight: Level 50 Technology Tanker
Primary Power Set: Invulnerability
Secondary Power Set: Energy Melee
Power Pool: Flight
Power Pool: Fitness
Power Pool: Fighting
Ancillary Pool: Energy Mastery
Hero Profile:
Level 1: Resist Physical Damage -- ResDam-I(A), ResDam-I(5), S'fstPrt-ResDam/Def+(25)
Level 1: Barrage -- KntkC'bat-Acc/Dmg(A), KntkC'bat-Dmg/EndRdx(3), KntkC'bat-Dmg/Rchg(13), KntkC'bat-Dmg/EndRdx/Rchg(23), HO:Nucle(45)
Level 2: Temp Invulnerability -- RctvArm-ResDam/EndRdx(A), RctvArm-ResDam(3), RctvArm-ResDam/EndRdx/Rchg(7), RctvArm-ResDam/Rchg(31)
Level 4: Bone Smasher -- T'Death-Acc/Dmg(A), T'Death-Dmg/EndRdx(5), T'Death-Dmg/Rchg(9), T'Death-Acc/Dmg/EndRdx(15), T'Death-Dmg/EndRdx/Rchg(34), T'Death-Dam%(46)
Level 6: Dull Pain -- Dct'dW-Heal/EndRdx(A), Dct'dW-Heal(7), Dct'dW-Heal/Rchg(13), Dct'dW-Heal/EndRdx/Rchg(27), Dct'dW-Rchg(34)
Level 8: Air Superiority -- KntkC'bat-Acc/Dmg(A), KntkC'bat-Dmg/EndRdx(9), KntkC'bat-Dmg/Rchg(11), KntkC'bat-Dmg/EndRdx/Rchg(33), HO:Nucle(46)
Level 10: Unyielding -- RctvArm-ResDam/EndRdx(A), RctvArm-ResDam(11), RctvArm-ResDam/EndRdx/Rchg(15), RctvArm-ResDam/Rchg(33)
Level 12: Swift -- Run-I(A)
Level 14: Fly -- Flight-I(A)
Level 16: Health -- RgnTis-Regen+(A), Numna-Heal(17), Numna-Heal/Rchg(17), Numna-Regen/Rcvry+(40)
Level 18: Invincibility -- LkGmblr-Def/EndRdx(A), LkGmblr-Def(19), LkGmblr-Def/Rchg(19), LkGmblr-Rchg+(23)
Level 20: Stamina -- P'Shift-EndMod/Rchg(A), P'Shift-EndMod/Acc(21), P'Shift-EndMod(21), P'Shift-End%(31)
Level 22: Taunt -- Insult-Taunt(A), Insult-Taunt/Rchg(34), Insult-Dsrnt%(36)
Level 24: Whirling Hands -- Oblit-Dmg(A), Oblit-Acc/Dmg/EndRdx/Rchg(25), Oblit-Acc/Dmg/Rchg(29), Oblit-%Dam(37), Oblit-Acc/Rchg(43), Oblit-Dmg/Rchg(45)
Level 26: Resist Energies -- ResDam-I(A), ResDam-I(27)
Level 28: Boxing -- P'ngS'Fest-Acc/Dmg(A), P'ngS'Fest-Dmg/EndRdx(29)
Level 30: Tough Hide -- LkGmblr-Def(A), LkGmblr-Rchg+(31), LkGmblr-Def/EndRdx(37)
Level 32: Tough -- RctvArm-ResDam/EndRdx(A), RctvArm-ResDam(33), RctvArm-ResDam/EndRdx/Rchg(43), RctvArm-EndRdx(46)
Level 35: Energy Transfer -- T'Death-Acc/Dmg(A), T'Death-Dmg/EndRdx(36), T'Death-Dmg/Rchg(36), T'Death-Acc/Dmg/EndRdx(37), T'Death-Dmg/EndRdx/Rchg(40), T'Death-Dam%(42)
Level 38: Total Focus -- T'Death-Acc/Dmg(A), T'Death-Dmg/EndRdx(39), T'Death-Dmg/Rchg(39), T'Death-Acc/Dmg/EndRdx(39), T'Death-Dmg/EndRdx/Rchg(40), T'Death-Dam%(42)
Level 41: Weave -- LkGmblr-Def(A), LkGmblr-Def/EndRdx(42), LkGmblr-Def/EndRdx/Rchg(43), LkGmblr-Rchg+(45)
Level 44: Focused Accuracy -- EndRdx-I(A)
Level 47: Physical Perfection -- Numna-Heal(A), Numna-Heal/EndRdx(48), Efficacy-EndMod(48), Efficacy-EndMod/Acc(48)
Level 49: Laser Beam Eyes -- Dev'n-Acc/Dmg(A), Dev'n-Acc/Dmg/EndRdx/Rchg(50), Dev'n-Acc/Dmg/Rchg(50), Dev'n-Dmg/EndRdx(50)
------------
Level 1: Brawl -- Empty(A)
Level 1: Sprint -- Empty(A)
Level 2: Rest -- Empty(A)
Level 1: Gauntlet
Level 0: Ninja Run
Code:| Copy & Paste this data into Mids' Hero Designer to view the build | |-------------------------------------------------------------------| |MxDz;1422;732;1464;HEX;| |78DA9D945B6F124114C7676129B0BB94454AEFA550282D2DD0F6CD5B34C6D6D8D42| |ABDD807ED25B49D52E2BA348046DEFC007D309AE8938946A389DFC0F82DD478F92C| |5ED67399F2A24F6EE0FF9B39CC39FB9FB3B32C3F98B78478785168D665A7D26CEEA| |C57DC3BB261ACCBBD43B7EED4AB6DFB92BBDFA8DF95FB95D4925BAB1EB682428824| |2FDB999707D26DCAD2A27BFF9EE3CA4665B7E6D45AED01F5F3B274A42C2DC00FD53| |64F628BEEA16C48B7553A1998E57ADD295D71B0B4C5E35ACB95CD66444D205E73AB| |06CDD68EA4DC8F2F1CD5F63A552BCD966CB4FBC1541EBE1FC3201A7C85E71305C09| |CD019FD7D101E112143A8CBD3451930267C2B046B95D0BB46289C07E8427C82821A| |17F46B49184C08DF18A12B4D488E120CA8EBE7BA01FF2D8121FD3621B449E8DE22A| |4B709C51DC267A81E506E024B1AFAECBA41B0960983D709E932C180DE07D5F2209B| |0FB17983CDA7D87C5199FF02E5C3CA7C98CD1B6CBE9BCDA7D87C008A9ABC4E98456| |A9709A108DF4A4432140A4228AAAA452F5037ED9BE4CB5E234C6C10BEC15D63D433| |CF1FB32974AA871123F4260821A81757F5E24F7C18EA79CA784C483E2398D0DA045| |BF1252484E2227D40C85409162CE853BDEFFB4139FD1E61F837218B8F664E4CFDA4| |59E117E12BD81CE0DB6B037C4606191A181BE27ADAD055811B1D5E247C879C1175B| |C46784F49DE4C9637EA87D451B5A751EE788A3B3EC51D2F660851039F135B1EE3E3| |92E1E392E1E392E5E332C1C725CFC7C586AC719535CE5939CECA7156EE5F593A789| |A549E26D9749EDD4EC50905DEC20B68D2B47AE4D369EAC43B380225955AE2673DB3| |C238A626CE3C22BC84D4594EF5CFBEA2D4B9B78C378CD78461BDF3F6C1072E71EDA| |F4859576F3044348AE4F5CE4BED856D5A2978F17F5DEFAD935B8657F1DF601DA50C| |A26DE06813650BA7DB38AAE06817650FA7DE874E76F434FA3A837216E51C4A02FC8| |9635C1934414C140B2582D28D1245B151E2288328CF51BC3F7B75F63D| |-------------------------------------------------------------------|
-
Is the Fighting pool really that mandatory for tanks?
-
Solo'd him as an EB with my DB/WP scrapper. Yeah, that trick of his suuuuucks to get hit with when you're not expecting it. Almost had me a couple times until I started pulling my attacks. With Dual Blades you're used to having your next attack in the chain lined up before you finish animating the current one.
Bad idea with Protean. You're locked in animation when that warning comes off, and then you're screwed. So I started throttling back the Nuclear Powered Blender, so I had time to scramble away.
Made it a real fun fight. I hope future endboss fights are like this, where it's not just You and Your Stats vs. a big bag of HP. Makes me look forward to GR. -
Judging by the little bit we've seen and how powers are built often leaning to some sort of style, I can see Kinetic Melee being a bit more of an outlier. Maybe not in some ways unlike Dark Melee. It's not just about raw damage, but has a whole bag of tricks backing it up like Siphon, Dark Consumption, and Soul Drain. Energy Aura for brutes and stalkers is equally kind of a goofy/unique armor set which doesn't really behave like most armor sets. It would not surprise me if Kinetic Melee is something along those lines, less about "OMG MASSIVE DAMAGE" and more with all kinds of ways to ruin someone's day if you're smart about it. Maybe some kinds of control, from knockdown/knockup to holds and debuffs or damage reworking.
The question I have about it is that after watching those animations, I worry it will be yet another melee set that doesn't work with Shields. We've already got katana, claws, spines, and dual blades that don't work with the Shield set because of the two handed animations. Looking at the swirlyness, I am concerned that a shield wouldn't work with that, unless they give us one handed animations or something for kinetics/shields. -
It's really hard to choose. However, I've got to say, the quality of the missions added in. The "Dark Mirror" arc missions are really well written and incorporate some stuff that really gives a sense of tension and epicness to the story. The final boss fight of the hero arc was a fun challenge for my scrapper because it wasn't just "stand there and pound on each other until one of you falls over." Had to pay attention, had to think a bit more.
But... the new Positron Task Force(s). They've just gone from being my least favorite TF to my favorite. I'd love it if the other signature task forces got this treatment.
I'm really hoping the quality of the missions and the Posi TF are indicative of both the quality and types of missions we'll be facing in GR. -
With Issue 17 going live right now, I'm sure the Rogue Isles are about to be ground zero for demonic hellbeasts bursting out of the ground. Going to ruin property values.
So how are you going to make your Demon Summoner? What secondaries are you going with? Got plots for the build?
Right now I'm planning on doing Demons/Storm. I've got Storms on my controller and love it, and it's a more active secondary than the other more buff centered sets. My only problem is what to take! Storms is such a lovely bag of tricks, I can't figure out what to drop from either set.
Here's what I'm trying to do:
I'd really like to squeeze in some of the Demon Summoning whip attacks, probably at least Lash and Crack Whip (go go Masterblapper :P). Since this is Masterminds, that means Leadership pool of course. Fitness, obviously. And a travel power. I'd LIKE to fit in an epic for concept reasons, but that's not a total dealbreaker.
What are your plans or suggestions on the set? -
Okay, let's work this out. Let's say you want to have different looks for each of your henchmen. You're Thugs, to make this simple. You want each of your three Thugs, both Enforcers, and your Bruiser to have a unique look with character level detail.
That's six costumes right off the bat.
Now remember that with Mastermind powers, when you upgrade a henchman using Equip Thugs and Upgrade Equipment (or whatever), their look changes. Some added on bit of armor or aura or other do-dad. That's actually a separate costume from the original, that just looks the same with the upgrades added to it. There are two upgrade powers per set, which means you have to add three more costumes for each henchman: one for with only the first upgrade, one for with only the second upgrade, and one for with both.
So six henchmen need four costumes apiece, for a total of twenty four unique costumes for each mastermind costume.
Now remember that each costume slot on a character is able to have differently customized powers. Presumably then your henchmen would fall into this category, so each costume slot would allow you to choose unique looks for your little horde.
At twenty four unique costumes for each of five slots, that becomes one hundred and twenty costumes, plus the five for the character themselves to make it one hundred and twenty five, per mastermind. (we won't even discuss customizing the thugs in Gang War)
125, people, ain't nothing to sneeze at.
One hundred and twenty five costumes. Even if I'm wrong about how the henchman upgrade costumes work, it still ends up being a rather good sized number. -
Thanks for the advice everyone. I'm tinkering with the my build right now.
As for the cost, this is partly theoretical for "if I ever have the cash." I've got this level of IOs on one of my characters, and it's taken a while. Though some sets are cheap-ish, like Crushing Impact, and I've already lucked into stuff like the Regenerative Tissue: +Regen, +End proc, and Steadfast Protection: +Def, so that helps. Most of my experience is with Willpower, so I tend to focus too much on regeneration than defense.
Should I try and squeeze in Toughness and Hasten? The laser eyes are for concept more than utility, same with Flight.