Guide: GameTree Linux #2 - The direct launch / test server
By
je_saist,
Posted on: 2011-08-03 13:08 in ALL ACCESS Gameplay Technical Issues Bugs
Configuring Game Tree Linux - Pre-Configure
With our Microsoft Windows Operating System installations now set to be auto-mounted, we are ready to proceed.
The next steps are pretty much the same as the first guide. If you do not already have City of Heroes installed under Game Tree Linux I have placed the configuration files online.
For this guide I am using the files from the Coh-Test server configuration..
If you need it, download the pre-config files

Extract them

Copy them
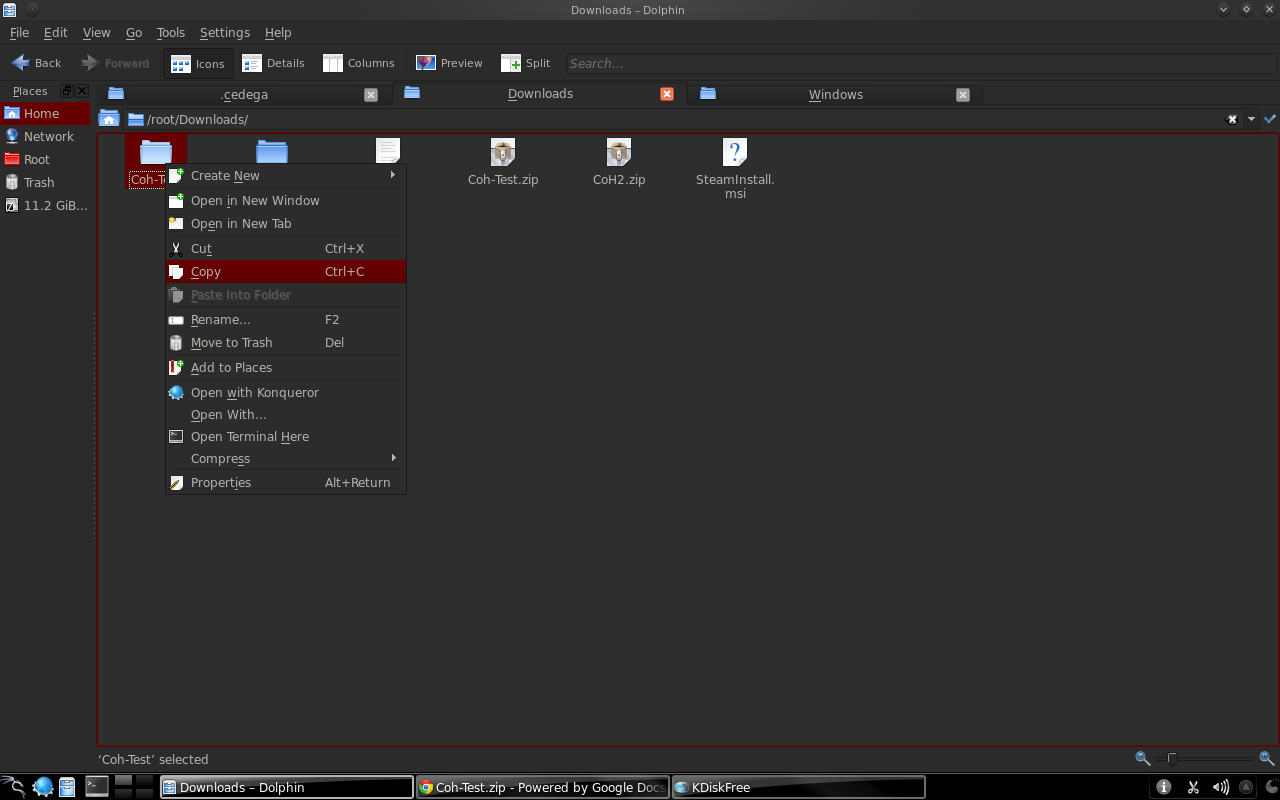
and paste them into your /.cedega folder.

Configuring Game Tree Linux - Kubuntu derived Configuration
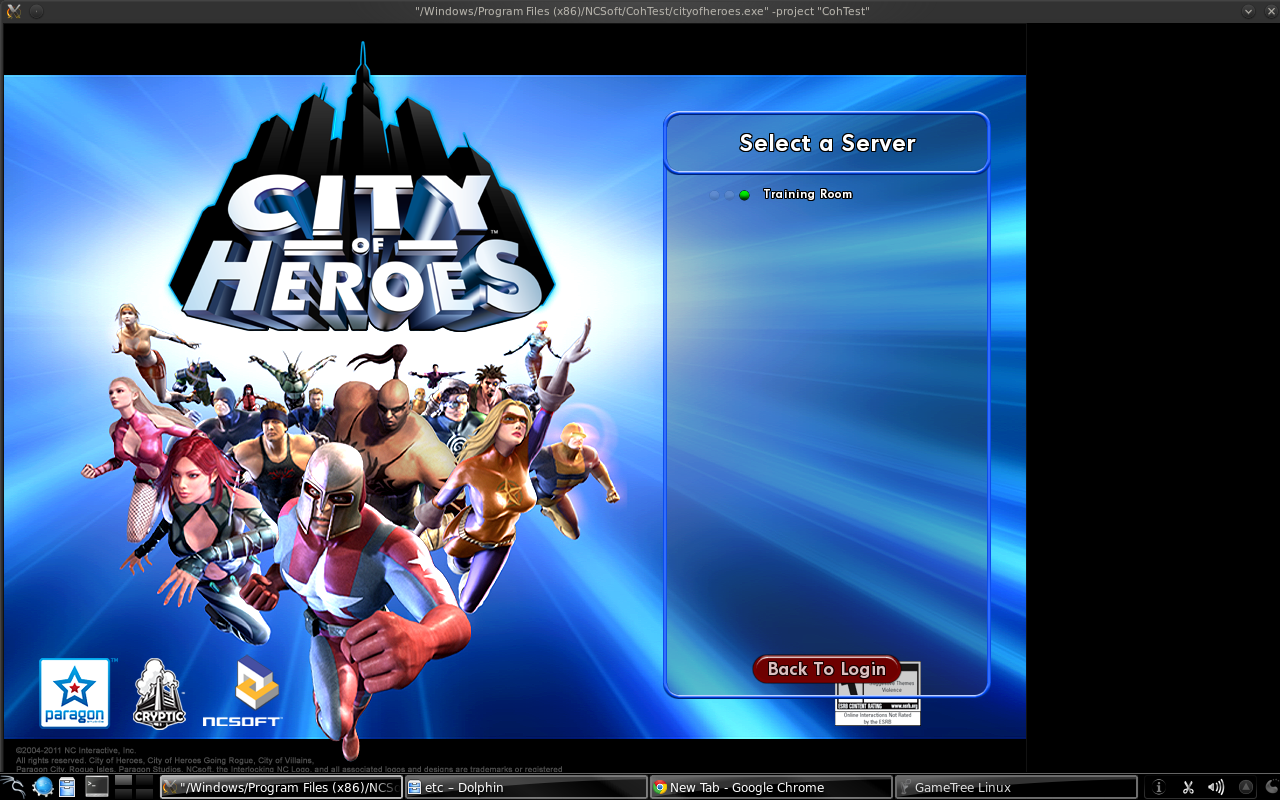
With the pre-configuration, or existing installation, files in place, when we open up Game Tree Linux there should be an entry for Coh-Test:

In order for this to work, we'll need to edit the Game Tree Linux Shortcut settings.

Click on the Browse button for Program
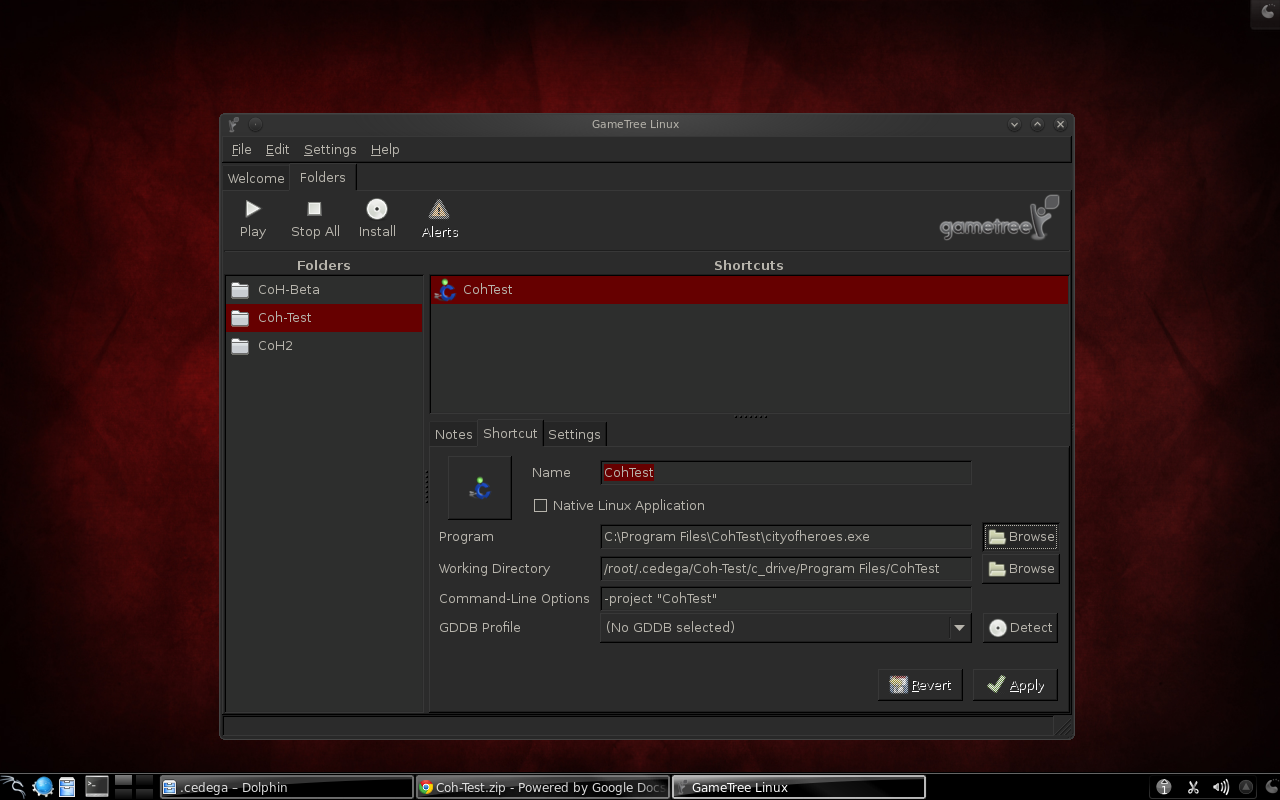
With the file select Window open we'll need to go track down our Windows folder from earlier.

For this Kubuntu derived distribution I need to go to File System

And now I can find my Windows folder.
Drill down to the cityofheroes.exe file and hit OK

Now we'll need to do the same thing with our Working Directory.
Click on Browse
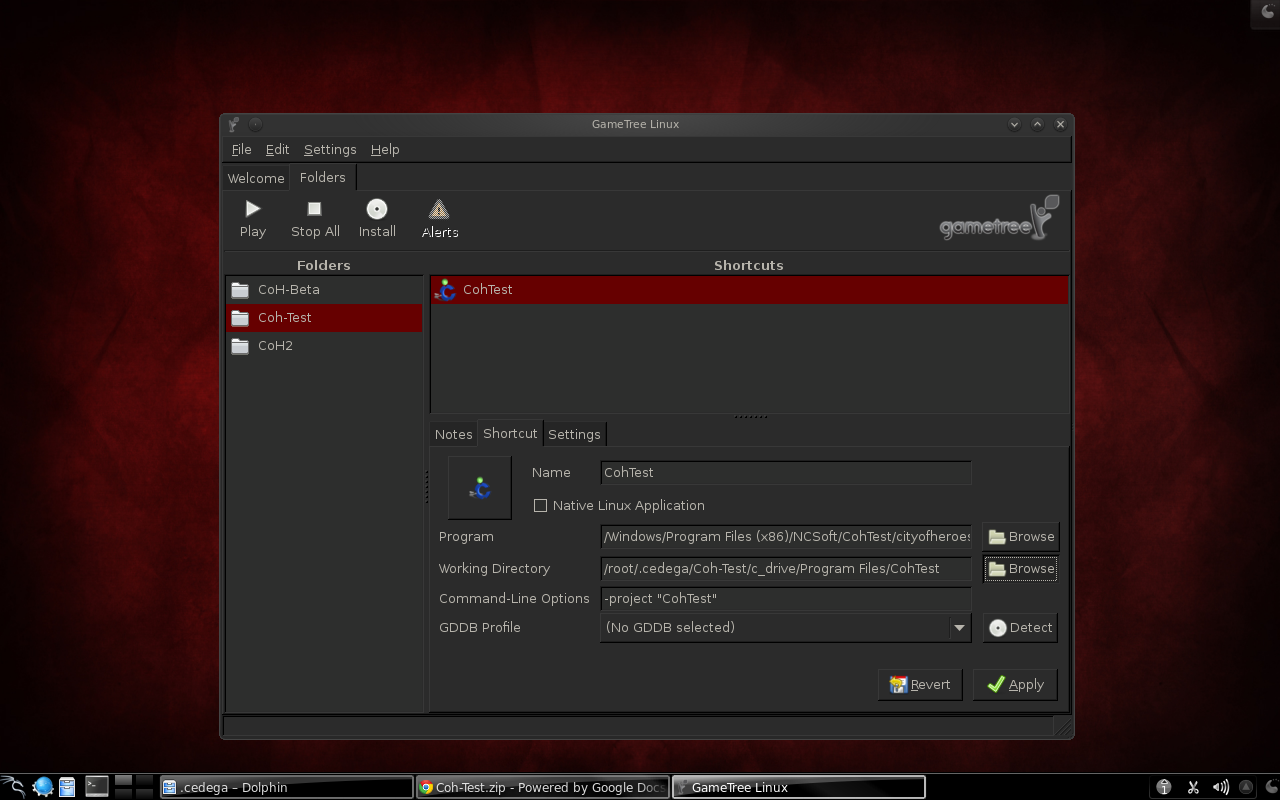
Then find your CohTest folder on the Microsoft Windows Operating System drive.

With that done, we should be ready to Apply
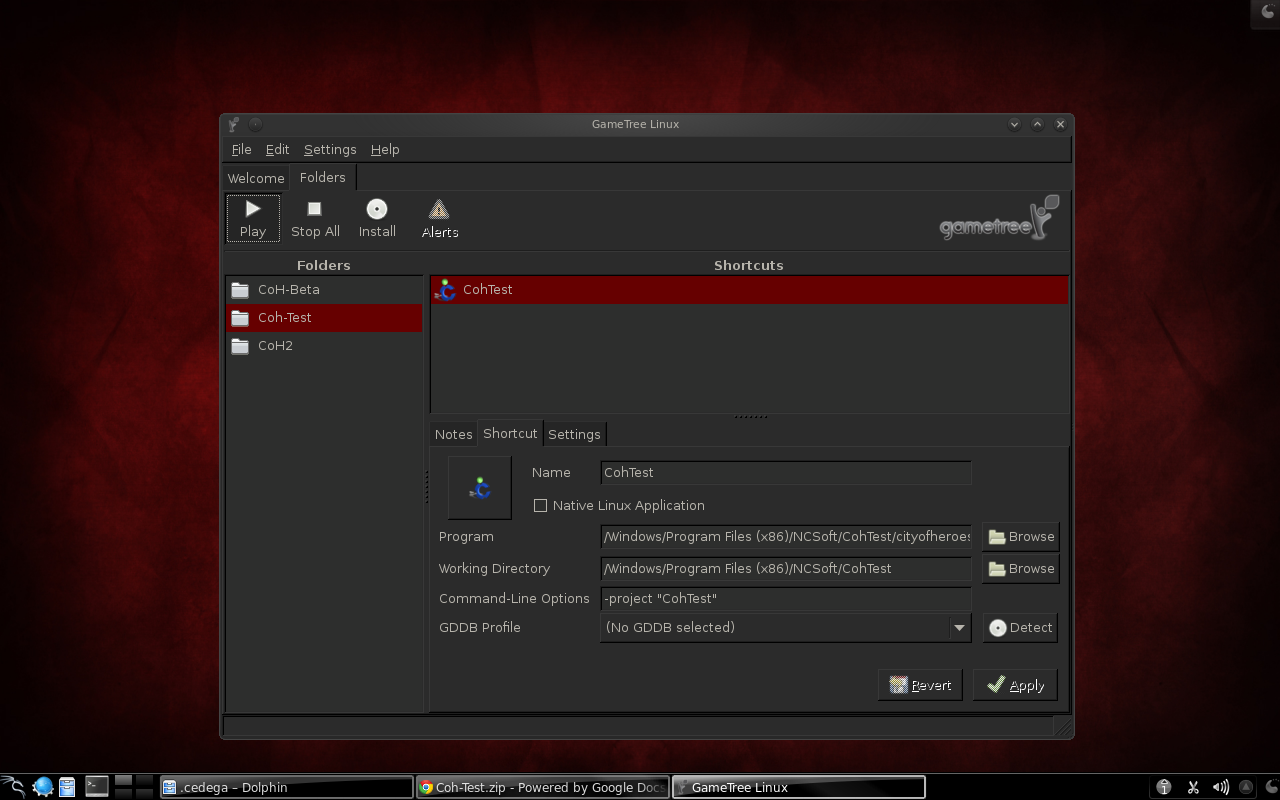
and then Play
If all went well we should be able to login and select our server

Configuring Game Tree Linux - Mepis Configuration
The procedure on Mepis isn't much different from this point.

Find the cityofheroes.exe file

Find the CohTest folder

Apply

And play:


Was originally going to post this as a follow-up to the other guide... but well... since that went on a not-entirely related tangent, not really interested in forcing interested readers to have to follow a thread to get to another guide.


The previous guide focused on a general method of getting City of Heroes to run under Game Tree Linux with the copying of installation files from the Microsoft Windows Operating System installation to a Linux Operating System installation.
This guide focuses instead on directly using the City of Heroes files installed under a Microsoft Windows Operating System.
The advantage to this method is that the user does not have to worry about copying files over. All the user has to do is patch under a Microsoft Windows Operating System, reboot back into their Linux distribution, and roll on.
The disadvantages are that there is quite a bit more user-configuration that will change depending on their specific Linux distribution; and the user will also need to bypass one of the security features inherit to *nix derived Operating Systems; and the user will need the ntfs-3g packages installed. Most distributions these day ship with ntfs-3g support, some do not.
So let's get started.
Hard-Drive Layout
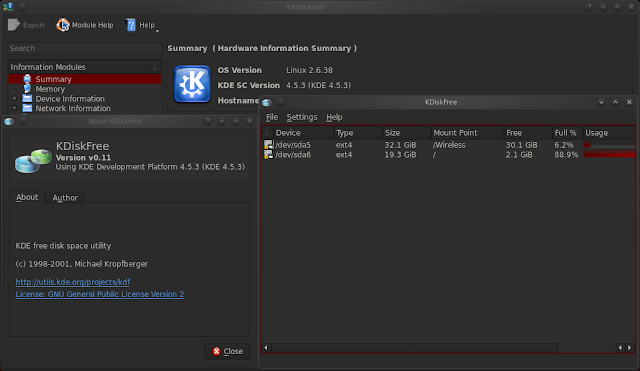
To begin with, you'll need to know your hard-drive layout. Tools like KDiskfree can show you this information.
Here in Mepis 11 64 bit I have a listing of the mountable hard-drives and their physical mount points.
Since I know that Microsoft Windows Operating Systems only support NTFS and FAT file systems by default, I know that my Microsoft Windows Operating System has to be installed on the ntfs-3g drive located at /dev/sda1
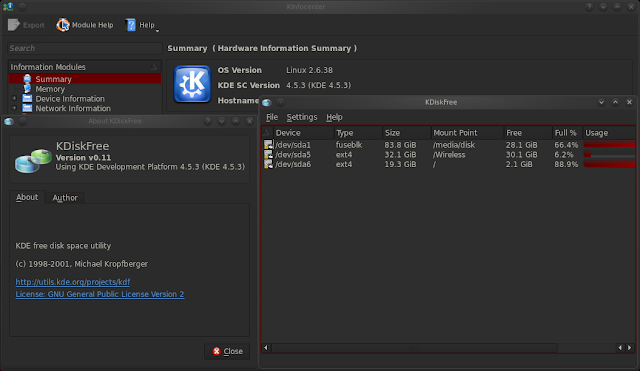
However, this information may or may not be reported by default under another KDE desktop, such as this Kubuntu derived distribution:
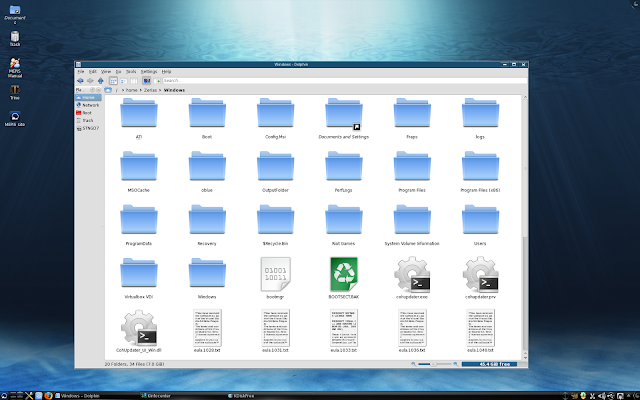
To get the Microsoft Windows Operating System hard-drive data I need I simply went and opened the Microsoft Windows Operating System drive under KDE Dolphin:
With the drive mounted, this Kubuntu derived distribution now tells me my ntfs-3g drive is at /dev/sda1
Setting Auto-Mount - Getting to fstab
With our hard-drive information in hand, now we can go about setting up the drive or partition with a Microsoft Windows Operating System Installation to be automatically mounted.
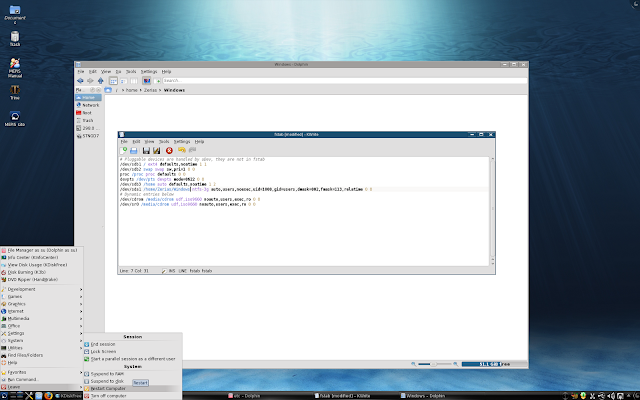
To do this we'll need to open up our /etc/fstab file. In order to edit this file we'll need to be in our /root account. Most KDE linux distributions have a link in the K launch menu to load up either Konqueror or Dolphin as a /root user.
If you do not have a menu option to do so, you may also be able to use the Run Command Function and the command of dolphin as su
If you don't have an option to open up your file manager as a /root user you'll likely need to accomplish this part of the install by logging out of your user-name and logging in as /root.
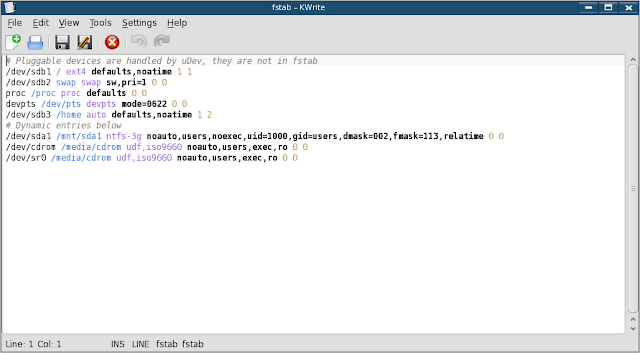
Once you have a /root window open, just head to /etc and click on fstab
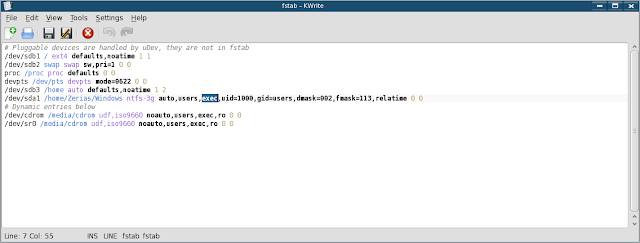
As we can see here in the Mepis installation the fstab is pretty thorough.
The Kubuntu derived fstab... well... isn't.
Setting Auto-mount - Editing fstab Mepis
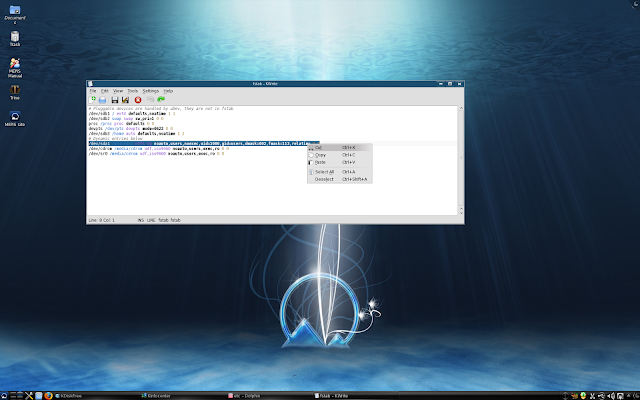
We'll start with the Mepis installation file first since our drive with an installation of a Microsoft Windows Operating System is already visible.
We just need to select the dynamic sda1 entry...
Cut it out...
and paste it above the dynamic line...
Our next step is to modify the launch instructions. Such as we want the drive to be auto-mount, so we'll turn off noauto and set auto
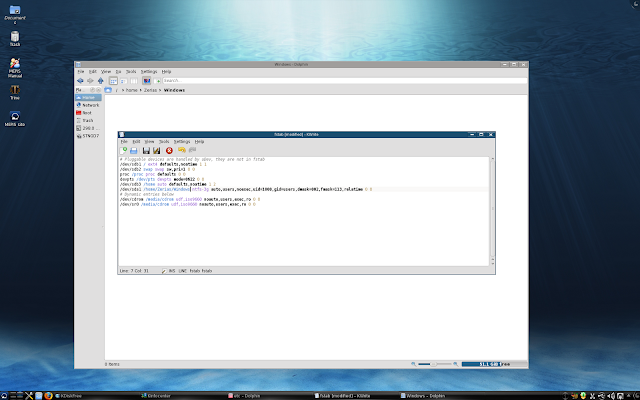
We can also use this opportunity to have the drive mount anywhere we want it to. In this case, I want the Windows drive to be mounted at /home/(username)/Windows
Before saving and leaving, we'll also need to turn noexec into exec
This is where we get into the "bypass one of the security features inherit to *nix derived Operating Systems" bit. The noexec flag turns off the ability of any file to execute itself at the hard-drive level. We've just turned that security feature... off.
Now, when we reboot, what should happen is all the files on our Microsoft Windows Operating System should be visible without further modification in the /home/(username)/Windows folder
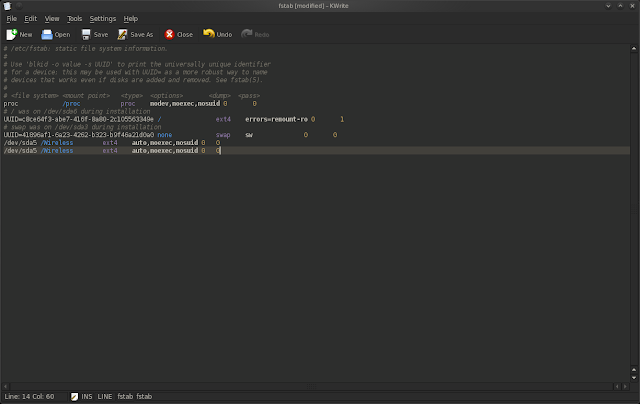
Setting Auto-mount - Editing fstab Kubuntu Derivative
With Mepis done, now for the Kubuntu side of things.
Since I already had a custom entry for a /Wireless partition, I just copied that entry to make this an easier fill in the blanks.
I take the information from Kdiskfree and fill in the blanks.
Don't forget to set exec
Then reboot